Key Takeaway:
- A shower splash guard is a useful addition to your bathroom that helps prevent water from splashing out of your shower or tub, keeping your bathroom dry and reducing the risk of slips and falls.
- DIY shower splash guards can be made using either tiles or plastic sheets. When making the splash guard with tiles, you will need to gather the necessary tools, cut the tiles into triangles, prepare wooden blocks, cover the backs of the tiles with mortar, and apply grout and caulk. Plastic sheets can also be used, and the process includes cutting them into triangles, attaching them to the corners of the tub or shower, and protecting sharp edges with a rubber seal strip.
- There are also other ways to contain water inside a shower, including sloping the floor, using a shower curtain, installing glass shower doors, using a curved shower rod, and applying caulk around the edges.
Introduction
A Comprehensive Guide to Making Your Own Shower Splash Guard
Prevent water from spilling outside of your shower with a DIY splash guard. This guide will provide step-by-step instructions for creating your own guard at home. Stay dry and keep your bathroom clean with this easy and affordable solution.
To begin, gather the necessary materials including clear vinyl, adhesive strips, and a pair of scissors. Measure the length of your shower and cut the vinyl accordingly. Follow the step-by-step instructions to properly install the guard.
One unique detail to consider is the option to personalize your guard by adding decorative elements such as stickers or custom designs. This will make your guard not only functional but also aesthetically pleasing.
Pro Tip: Use a hairdryer to smooth out any wrinkles or bumps in the vinyl for a more polished look.
With these easy steps and a few simple materials, you can create your own shower splash guard and avoid unnecessary water damage. Say goodbye to soggy towels and cumbersome cleanups and hello to a clean and dry bathroom.
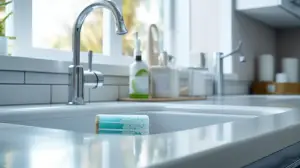
What is a Splash Guard?
A splash guard is a device that prevents water from spilling out of a shower or tub and onto the floor. It is typically made of plastic or glass and can be installed on the shower door or wall. Splash guards come in various shapes and sizes and can be customized to fit any shower or tub. They are easy to install and maintain and can help keep your bathroom clean and dry.
To make your own splash guard, you can use materials such as plexiglass or polycarbonate sheets, and attach them to your shower wall using a waterproof adhesive. Pro Tip: To ensure a secure attachment, use a silicone adhesive specifically designed for use in high-moisture environments.
How does a Splash Guard work?

A splash guard prevents water from splashing outside the shower area. It works by directing the water toward the drain or shower floor. The splash guard can be made using different materials such as shower curtains, glass panels, or acrylic sheets. These materials are designed to be waterproof and sturdy, ensuring they do not wear off easily. To effectively work, the splash guard should cover the entire shower area. It is also advisable to install it at the right height to ensure maximum effectiveness.
DIY Shower Splash Guard using Tiles
I recently came across an effective way to keep my bathroom floors dry and splatter-free – DIY Shower Splash Guard using Tiles! This approach offers a sleek and stylish design to enhance the bathroom decor and is relatively easy to install.
To start, you will need to gather all the necessary tools and cut the tiles into triangles. Then, prepare the triangular wood blocks to fit the tiles, and cut rectangular pieces of tiles to match the block dimensions. Once cut, it’s time to cover the backs of the tiles with mortar and attach the tiled blocks to the corners of your tub using strong construction glue. Finally, apply grout and wipe with a sponge to clean any excess grout, apply a caulk bead along the seam and let everything cure before applying grout sealer for the final finish.
Gather necessary tools for DIY shower splash guard using tiles
To create your own DIY shower splash guard using tiles, you need to gather the necessary tools and materials. There are specific requirements that must be met to ensure the creation of functional and visually appealing splash guards. Requirements:
- Tile cutter or saw
- Triangular wood blocks
- Rectangular tile pieces
It is crucial to perform all tasks precisely when creating the DIY shower splash guard using tiles. Hence, accuracy is important when cutting the triangles to fit the corners of your tub and preparing triangular wood blocks to suit the tiles’ dimensions. When it comes to creating a functional and visually appealing design for your DIY shower splash guard, certain extra details must not be overlooked. These details include ensuring that the tiles adhere correctly with strong construction glue and applying a bead of caulk along seams after the application of grout. In older homes, slip hazards caused by water spilling on floors can be dangerous. And determining if hiring a contractor or completing ‘Do-It-Yourself’ projects is suitable for homeowners can depend on their skill level with tools and experience in home repair work. Who knew geometry class would come in handy for keeping water in the shower?
Cut tiles into triangles
Before starting your DIY shower splash guard project, ensure your workspace is safe. Here’s how you can turn off the water to your toilet or other water sources that may disrupt the process.
To create a DIY shower splash guard using tiles, a triangular shape is necessary. This allows for optimal corner coverage and effectively prevents water from escaping.
- Cut the tiles into triangle shapes using a tile cutter or other appropriate cutting tools.
- Ensure that the triangles fit snugly into the corners of your shower or tub.
- Prepare wood blocks in triangular shapes to fit each tile triangle. The size should match that of the tile pieces.
- Add mortar to the back of each tile piece before attaching it to its corresponding wooden block.
- Using strong construction glue, attach these now-tiled blocks to the corners of your shower or tub.
Additionally, make sure to apply grout between the tiles and wipe away any excess with a wet sponge. Finish off by applying caulk along all seams and edges before allowing everything to cure fully, followed by the application of grout sealer.
When cutting tiles into triangles, precision is key to ensure proper fitting in each corner. A recommendation would be to measure twice and cut once for accuracy in dimensions.
It’s said that ancient Egyptians were credited with creating their own versions of splash guards in their showers – made from mud and straw! As technology has advanced over time, so too have our methods for creating simple bathroom solutions like this one.
Get ready to be a DIY master carpenter and shape those triangular wood blocks like a boss!
Prepare triangular wood blocks to fit the tiles
To fit the tiles, you need to prepare triangular wood blocks by cutting them into an appropriate size. Here’s how to do it:
- Cut the Wood Block: measure and cut a block of wood into a triangular shape that corresponds with your tile corner.
- Sand the Edges: sand all the edges of the triangle to make sure they are smooth for maximum protection against splashes and spills.
- Cleanse The Block: cleanse all debris from sanding off of the triangle.
When preparing triangular wood blocks as per requirement, consider following these 5 steps:
- Cut Wood Chunk Into Triangular Shape – Measure and cut a wooden block into a triangular shape that agrees with your tile corner needs.
- Sand Block Edges – Smooth all edges using sandpaper for added protection against undesirable spillage and splashes.
- Remove Debris Via Cleansing – Wipe down debris leftover from sanding.
- Ensure Dimensions Are Perfect – Match dimensions required. If it doesn’t fit accurately, trim it down until it does.
Ensure that each wooden block is fitting squarely on top of its corresponding area. From there, proceed to cover these blocks with mortar.
To obtain maximum effectiveness and efficiency when preparing triangular wood blocks as required, ensure accurate measurements before proceeding to cut. Once chopped up, sand away any unwanted residue thoroughly. Don’t forget to clear off any remaining microfiber or mop fibers after finishing; you don’t want anything affecting adhesive capabilities.
Interestingly enough, many people find that their DIY shower splashguard offers more personalized performance by way of customizations like paint jobs or decals designed to entertain children during bath time.
Cut rectangular tile pieces to match the dimensions of the block
To create a DIY shower splash guard using tiles, you must cut rectangular tile pieces to match the dimensions of the block. This ensures that the tiled blocks fit snugly into the corners of your tub or shower stall and properly deflect water.
- Cut rectangular tile pieces that are the appropriate size for your wooden blocks.
- Ensure that each tile piece fits securely on top of your wooden block.
- Cut any excess tile from around the block carefully.
When cutting each tile, it’s crucial to maintain an even thickness of mortar. This precision will produce an even surface for your DIY shower splash guard and prevent any gaps in tiles where water could seep through.
Protecting areas surrounding fitments during installation is key to preventing damage to adjoining areas. By protecting sharp edges with a rubber seal strip, no need to worry about joining surfaces around fixtures such as faucets or taps. If you notice any leaks, here’s how to fix a leaky bathtub faucet.
Creating Splash guards ultimately saves time on cleaning up after a quick shower, specifically if you live in communal facilities or shared living spaces without separated bathrooms.
Get ready to play in the mud – it’s time to cover those tiles with mortar!
Cover the backs of your tile with mortar
Applying mortar to the backs of your tiles is an essential step in creating a successful DIY shower splash guard. Mortar acts as an adhesive and secures your tiles in place, preventing them from coming off or shifting while taking a shower.
- First, prepare your work area by ensuring that it’s clean and free from any debris or dust.
- Mix the mortar according to the manufacturer’s instructions. Ensure that you use enough water to get a smooth consistency.
- Carefully scoop up some of the prepared mortar using your trowel and start applying it on the back of each tile one at a time.
- Make sure that you apply enough mortar to cover the entire surface of each tile, but not too much as this can cause difficulty when placing them onto other surfaces.
- Repeat this process for all tiles needed for your design until all pieces have been covered with mortar and are ready for installation.
It is crucial to keep in mind that excess amounts of mortar can seep through gaps and cause damage to surrounding materials such as wood or drywall. Therefore, applying just enough mortar will ensure it sticks appropriately without damaging other surfaces in the process.
Pro Tip: When choosing which form of DIY splash guard suits your home needs best, consider how easy it is to clean after its installation. Make sure your tiled blocks and construction glue have a strong bond, or else your splash guard may make a splash of its own.
Attach the tiled blocks to the corners of your tub using strong construction glue
To attach the tiled blocks to the corners of your tub using strong construction glue, the process involves various steps. The tiles are used to create a splash guard in DIY showers, and they need to be attached securely for longevity.
- Cut tiles into triangles.
- Prepare triangular wood blocks that fit the tiles.
- Cut rectangular tile pieces that match the dimensions of the block.
- Apply strong construction glue on the back of each tile and attach it to the corner of your tub.
It’s essential to pay close attention when applying glue. It’s also advisable to press down firmly on each tile after attaching it. This process is repeated until all four corners have splash guards.
One unique detail to note is that before attaching any tiles, ensure you have gathered all necessary tools, including tile cutters, woodcutters, and mortar. Furthermore, cleaning and drying your tiles’ surface before installing them will increase their adhesion strength.
In summary, creating a DIY shower splash guard with tiled blocks requires precision and attention to detail. All materials must be correctly measured and prepared before attaching them with strong construction glue.
It is essential always not to rush through this process because haste may result in faulty installation. Following these steps should provide you with an effective shower splash guard that can assist in containing water within your shower space.
A historical perspective shows that homeowners who prefer DIY projects sometimes struggle with attaching tiled blocks when making their shower splash guards. With more experience and practice, perfection comes naturally over time.
Grout and wipe, just like a crime scene cleaner after a messy murder.
Apply the grout and wipe with a wet sponge to clean any excess grout
When finishing a DIY shower splash guard using tiles, it is necessary to apply the grout and wipe it with a wet sponge to clean any excess grout. This step is essential for ensuring that the tiled blocks remain sturdy, durable, and water-resistant.
Here is a 4-step guide to apply the grout and wipe with a wet sponge:
- Using a grout float, carefully spread the grout over your tiles. Be sure to fill in all of the gaps between your tiles so that they bond effectively.
- After applying the grout, use a damp sponge to remove any excess material from the surface of your tiles. Be gentle and ensure you do not remove any of the newly applied grout from within your tile gaps
- After wiping off most excess dirt on the tiles surface, wait for five minutes before repeating the cleaning.
- When all surfaces are clean and all visible glue has been wiped out, leave it to dry completely before proceeding to seal it as required.
It’s important to note that wiping with a damp sponge will make sure that any remaining residue or film will not be scrapped off, leaving you with an almost smooth finish.
Interestingly, sealing the splash guards improves their durability and water-resistance qualities thus making them last longer. Once this stage has been completed successfully then The caulk could still be applied around the edges where possible water leaks may lurk – offering extra insurance against leakage in the future.
Seal the deal and keep your shower water squeaky clean with a simple bead of caulk.
Apply a bead of caulk along the seam
To seal the gap or joint between two objects, such as a shower splash guard and the wall or floor, it’s necessary to apply a waterproof material that can prevent water leakage. In this case, one needs to apply a bead of caulk along the seam. Keeping your bathroom sealed properly can also help in preventing bathroom smells like rotten eggs.
- Clean the seam – Before applying caulk, clean the area thoroughly. Use soap and water to remove any dirt or grime buildup. Allow it to dry completely.
- Apply caulk – Cut off the tip of the caulk tube at an angle and squeeze out a small amount of caulk. Begin at one end of the seam and apply steady pressure on the trigger while moving in one direction.
- Smooth it out – Once you’ve applied caulk all along the seam, gently smooth it out using your finger or a tool to create an even finish.
After applying caulk, make sure to let it dry completely before using your shower.
It’s essential to wait for around 24 hours before showering again once you have applied a bead of caulk along the seam to allow it adequate time to cure fully.
Let your DIY shower splash guard cure and become the envy of all your shower guests.
Let everything fully cure, then apply a grout sealer
After completing your shower splash guard project, the final step is to let everything cure completely before sealing the grout. This allows for optimal bonding between the materials and ensures a lasting finish. The next step is to apply a grout sealer that will not only protect the surface but also prevent moisture from penetrating it. When it comes to keeping your bathroom floors clean after installing your DIY splash guard, you might wonder, can you mop with dish soap? Yes, indeed! This common household item can do a great job cleaning your floors.
Here’s a simple 4-step guide on how to let everything fully cure, then apply a grout sealer after DIYing your shower splash guard with tiles or plastic sheets:
- Allow enough time for the adhesive to dry completely.
- To ensure full curing, give it at least 24-48 hours before sealing.
- Clean the surfaces thoroughly with water, making sure no debris or dust remains.
- Apply a grout sealer evenly on all surfaces using an applicator brush or roller brush. Maintaining clean surfaces is vital, learn more about how to clean shower tiles without scrubbing. Let it sit for some time before wiping off the excess sealer with a clean cloth. Doing this can prevent issues like mold growth that can be a nuisance in bathrooms.
It’s essential to let everything fully cure before applying a grout sealer as it helps achieve maximum adhesion and prevents moisture-related issues such as mold growth and mildew formation. The proper curing time varies depending on factors such as temperature and humidity, so it’s crucial to follow manufacturer instructions and use the appropriate caulk or adhesive type.
Important Fact: Grout sealing is necessary for keeping your tiled surfaces in top-notch condition while preventing dirt, stains, and bacteria buildup. But if you encounter an accidental shaving cream spill on your bathroom floor, here’s how to clean it.
Ditch the tiles and make a splash with DIY shower splash guards using plastic sheets.
DIY Shower Splash Guard using Plastic Sheets
As someone who loves taking long showers, I always struggled with water getting everywhere around the bathroom. I recently came across an incredible DIY shower splash guard idea that has solved all my problems. In this section, I will take you through the steps of creating your own splash guard using plastic sheets.
- First, we’ll discuss the essential materials you’ll need to gather before you begin.
- Next, we’ll cover how to cut the plastic sheets into triangles that fit the corners of your shower.
- We’ll also go over how to properly clean and dry the surface before applying the glue and splash guards.
- Finally, we’ll discuss how to protect the sharp edges with a rubber seal strip, ensuring that your new creation works perfectly and looks great.
Gather necessary materials for DIY shower splash guard using plastic sheets
To create a DIY shower splash guard using plastic sheets, you need to gather the necessary materials. These materials can help you keep water at bay and safeguard your bathroom’s floors and walls from getting wet.
Here is a 3-Step Guide on how to gather the necessary materials for the DIY shower splash guard using plastic sheets:
- Start by measuring the dimensions of your bathroom’s corners where you want to install the splash guard. You can use a measuring tape for accurate measurements.
- Buy plastic sheets that are durable and waterproof. You can choose clear or frosted sheets in custom sizes to fit your space accordingly.
- Get glue or adhesive tape designed specifically for use with plastics to attach the plastic sheets onto your shower corners easily.
Additionally, consider covering up sharp edges with rubber seal strips, cleaning surfaces thoroughly before application, and allowing adequate time for the glue or adhesive to dry completely.
Lastly, it is worth mentioning that this method is just one way of creating a DIY shower splash guard. Other methods include using tiles, stand-alone guards or complete doors/screens which may require different sets of tools and equipment.
Get your geometry skills ready, because it’s time to turn plastic sheets into triangular shower superheroes.
Cut plastic sheets into triangles
To create a DIY shower splash guard using plastic sheets, you need to cut the plastic sheets into triangular shapes that can fit into the corners of your tub. This step is crucial for ensuring that water is contained within the shower area, preventing messy bathroom floors and potential slip hazards.
Here’s a 6-step guide on how to cut plastic sheets into triangles:
- Measure the dimensions of your shower or tub corner to determine the size of your plastic sheet.
- Next, mark out triangular shapes on your plastic sheet with a ruler and pen.
- Cut out each triangle shape using sharp scissors or a utility knife.
- Smooth out any rough edges with sandpaper or file to prevent injuries or damage to the surrounding surfaces.
- Try fitting the plastic triangles into your corner space; if it does not fit correctly, trim off excess areas until it fits precisely.
- Finally, label each triangle piece so you know where they belong, then set them aside until installation.
It’s essential to handle the sharp edges with care during this entire process and protect them from causing damage or injuries.
One more thing to note when creating DIY projects involving plastics is their heat sensitivity. Plastics can melt easily when subjected to high temperatures or prolonged exposure to sunlight.
A true fact: According to a report by Grand View Research, Inc., “The global market value for splash guards was USD 3.9 billion in 2020 and is expected to grow at a compound annual growth rate (CAGR) of 4.5% from 2021-2028.”
Make sure the pieces of sheet fit the corners of your tub or shower
To ensure a seamless installation process, it is essential to make sure that the pieces of the plastic sheet fit perfectly in the corners of your tub or shower. This step is crucial to prevent water leakage and maintain a clean and dry bathroom environment.
- Cut the plastic sheets into triangles according to the size of your corners.
- Measure and mark the dimensions of your tub or shower’s corner on the plastic sheets.
- Cut the marked triangles using scissors or a knife.
- Test fit the cutout pieces onto your corners to ensure that they match correctly and make any necessary adjustments before glueing.
It is critical that you pay attention to any possible variations in angles or sizes that occur due to plumbing or architectural complexities. Any miscalculation can lead to unwanted water splashes outside of your shower area.
When cutting and measuring, use precise tools and techniques for optimal results. A hacksaw saw blade with fine teeth can work well on plastics. Use sandpaper for smoothing rough edges along with rubber seal strips to cover sharp parts once they are attached in place.
By carefully following these steps, you can achieve an efficient splash guard that will protect your bathroom from splashes while still enhancing its aesthetic appeal.
Because nothing sticks like a clean and dry surface, prepare your shower before applying the splash guards.
Clean and dry the surface before applying the glue and splash guards
To ensure a secure and stable installation of the splash guards, it is important to properly clean and dry the surface before applying glue and splash guards. This ensures that any dirt, debris or moisture does not interfere with the adhesion of the glue. Follow these simple steps to clean and dry the surface before applying glue and splash guards:
- Remove any old adhesive residue or caulking using a scraper or putty knife.
- Clean the surface thoroughly with soap and water to remove any dirt or grime.
- Dry the surface completely using a towel or cloth. Make sure there is no residual moisture on the surface which can cause hindrance in sticking of the splash guard.
- Use alcohol wipes to clean off any remaining contaminants such as oil, grease, and mold.
- Double-check for cleanliness, then you are ready to apply your adhesive and splash guard.
It is important to note that if there is an issue with adhesion due to improper cleaning, it can lead to serious problems such as water leakage from underneath your shower walls. To avoid this risk, make sure that the surface you are working on is completely clean before applying adhesive. Additionally, make sure that you have all the necessary tools required for cleaning, measuring, cutting, and gluing as per your project requirement. Don’t miss out on fully enjoying your showers without worries of water leakage by not taking care of air bubbles between tiles. Ensure proper cleaning before adding new splash guards!
Protect the sharp edges with a rubber seal strip
To safeguard yourself from the sharp edges, it is better to have a provision of protection utilizing a rubber seal strip during the installation process.
- Use a rubber seal strip while installing to protect yourself from sharp edges.
- Select an appropriate size and length of the sealing strip which will suit your shower guard.
- The seal should be fitted to the splash guard directly along its edge with no space between the strip and the guard.
- Cut strips into 45-degree mitered corners before fitting them onto each joint of your shower panels or corner seam edges.
- The sizes of seams can differ, so measure them appropriately before cutting and installing your seal strips.
- Make sure that you install it accurately as a little gap can lead to water leaks.
Rubber Seal strips are an essential part of any DIY shower splash guard project. Though delicate in handling, these strips help avoid injuries caused by sharp edges, hence reducing accidents.
Once my friend had lacerated his finger while setting up his bathroom due to eroding ceramic tile pieces he was using as splash guards. He soon realized the need for additional safety measures like rubber seal strips installed where there were sharp-edged tiles for protection.
8 ways to contain water inside a shower
When it comes to designing your shower, finding ways to contain water is a top priority. After all, no one wants water pooling outside of their shower or causing water damage in their bathroom.
In this section, I’ve gathered a range of solutions for you to explore. From sloping the floor to applying caulk around the edges, the options for containing water inside your shower are extensive. You might prefer a shower curtain or a full-size splash guard, or you might opt for a more sleek look with glass shower doors or a curved shower rod.
Let’s dive in and explore the options!
Slope the floor
Creating a gradient on the floor of a shower area is crucial to prevent water from spilling out. This can be achieved by sloping the floor.
- Identify the drain area and mark it with tape.
- Then use a level or laser guide to identify the highest point of the shower floor.
- Mix cement with sand and water in a bucket according to the instructions on the package.
- Pour the mixture onto the shower floor using your leveling tool in order to spread it evenly.
- Smooth out any bumps or ridges with a screed board by using short back-and-forth strokes across the entire surface while moving away from yourself.
- Let dry for an appropriate amount of time as per instructions and cut any excess material around drains if required.
It’s crucial to ensure that no low spots are created during this process, which would not allow proper drainage.
To provide more stability to slope floors, scrubbing brushes can be helpful in aggressively cleaning tiles that will allow grout lines to bond better. However, avoid making deep scratches on tile surfaces.
Don’t let water escape your shower – slope the floor today. Keep your shower contained and your comedy uncurtained with these DIY splash guard options.
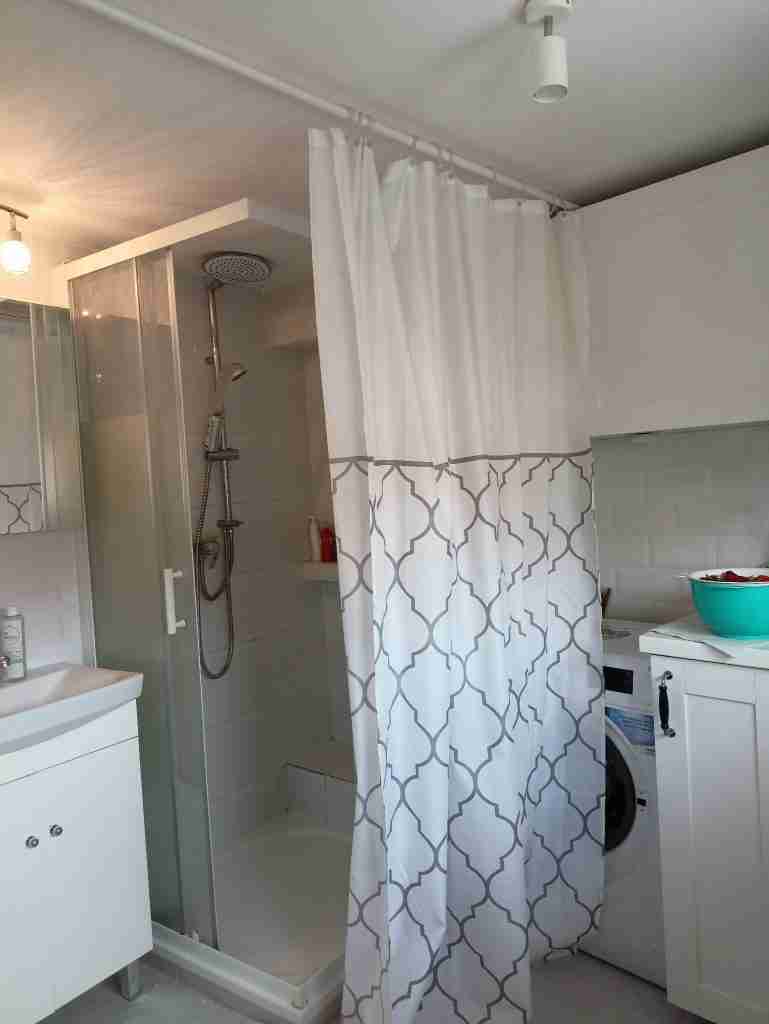
Use a shower curtain
Using a shower curtain is an effective method for containing shower water and preventing it from spilling onto the floor. Here is a simple 5-step guide to using a shower curtain effectively:
- Choose a high-quality material for the shower curtain that can withstand water exposure.
- Ensure the size of your shower curtain rod is appropriate, and install it securely.
- Select a shower curtain design that complements your bathroom decor.
- Trim the bottom of the curtain so it hovers roughly one inch off the wet surface to avoid any mold build-up.
- Avoid using multiple layers of curtains as this could cause mold accumulation and bacteria growth, which could be detrimental to one’s health.
When choosing a shower curtain, consider its color and design. A colorful or patterned one can add color to your bathroom while complementing your fixtures without sacrificing functionality.
It is noteworthy that using a shower liner in conjunction with your regular fabric or plastic shower curtain provides additional protection against water splashing out onto the floor.
Therefore, adopting this simple process can save you time, energy, and money that would otherwise have been spent cleaning up puddles each time after having a bath.
Keep your shower water in check and your slippery floors at bay with a stand-alone splash guard.
Use a stand-alone splash guard
A standalone splash guard is a solution to prevent water from escaping the shower or bathtub.
- Measure the length and width of your tub or shower.
- Purchase a splash guard with suction cups that can fit onto the sides of your tub or shower.
- Clean the surface of your tub or shower where the suction cups will be placed with rubbing alcohol.
- Add some water to the back of each suction cup and firmly press them onto the sides of your tub or shower.
- Position the splash guard in between the suction cups, creating an effective barrier against water splashing out.
- Remove and reattach as necessary for easy cleaning and maintenance.
When using a standalone splash guard, it’s important to position it properly to maximize its effectiveness against water splashing out, especially during more vigorous activity in the shower.
According to a DIY article by The Spruce website, darker colors tend to hide soap scum and other dirt on plastic splash guards better than clear ones.
Going full-size with your splash guard means maximum protection, minimum mess, and a feeling of triumph over wayward water.
Use a full-size splash guard
Using a full-size splash guard is an effective way to prevent water from splashing out of the shower area. Instead of using smaller splash guards or curtains, which may not cover the entire width and length of the shower, a full-size splash guard provides comprehensive protection.
Follow these 5 simple steps when using a full-size splash guard:
- Measure the length and width of your shower area.
- Purchase a full-size splash guard that matches the dimensions of your shower.
- Install the splash guard on the edges of your shower, making sure it covers all sides completely.
- Seal off any small gaps or spaces around the splash guard with caulk or glue to ensure that no water can leak through.
- Clean and dry any excess water on the surface after each use to prevent mold or mildew growth around the edges of the splash guard.
It is important to note that full-size splash guards can be made from various materials such as glass, plastic, or metal. Choosing a durable and easy-to-clean material will ensure that your splash guard lasts for years.
Full-size splash guards are an excellent alternative to traditional shower curtains which need regular cleaning and replacement due to mold and mildew growth. By investing in a high-quality full-sized option, you can reduce maintenance efforts and improve cleanliness levels in your bathroom while not worrying about excess water leaking out.
Consider using a full-size splash guard today if you want a long-lasting solution to protect your bathroom floors from unwanted leaks and spills. Don’t miss out on this option’s benefits – it’ll help make your showers stress-free while adding additional elegance to your bathroom decor! Say goodbye to soggy socks and hello to a crystal clear view with glass shower doors.
Install glass shower doors
Glass shower door installation is a suitable option to prevent water from splashing out of the shower area.
- Begin by measuring the width and height of your shower/tub space.
- Select a glass shower door kit that fits your measurements and purchase it.
- Install the metal frame and attach the glass panels to it, using screws and/or adhesive glue.
It’s important to note that installing glass shower doors requires careful handling as they can be fragile and heavy.
Glass shower doors come in various designs, such as frosted or clear, and can add an elegant touch to any bathroom decor.
The right curve can keep water from taking the wrong turn.
Use a curved shower rod
When it comes to keeping water inside a shower, one solution is to use a curved shower rod. Here’s a 5-Step Guide on how to effectively ‘Use a curved shower rod’:
- Choose the right-sized rod that will fit inside your shower.
- Carefully read all instructions before installation.
- Attach one end of the rod to the wall and the other end to the opposite wall at an angle.
- Hang your shower curtain, ensuring that it touches both sides of your tub tightly.
- Test for any gaps between the curtain and walls by turning on your showerhead.
A proper curved shower rod can be quick and easy to install with minimal tools or expertise required. The unique detail about using a curved shower rod is that it creates more space in your shower area while preventing water from spilling outside.
Don’t miss out on choosing this option when it’s time for you to update or improve upon your current bathroom setup! Invest in a curved shower rod today for added comfort and protection against potential messes.
Keep your shower contained, not your laughter with these DIY splash guard options and helpful tips.
Use a shower liner
Cover Your Shower Floor with a Liner
The shower-liner protects your bathroom floor from water damage during showering.
- Clean and dry the surface before applying the liner
- Measure the size of your shower’s base correctly and cut the liner with scissors accordingly
- Lay over the shower’s base, let the liner drape up to the walls’ sides, trim excess portions, bend corners towards walls using your fingers
Shower liners come in various color schemes, shapes, and sizes, which makes them easily blend into any kind of bathroom.
Experience peace of mind with these easy steps to protect your bathroom floor. Install it now!
Seal the deal and keep the water in with a little caulk around the edges.
Apply caulk around the edges
To prevent water leakage, you can easily apply caulk around the edges of your shower area. This will not only keep the water contained but also prevent unnecessary damage to your bathroom.
- First, prepare the surface by cleaning and drying it properly.
- Next, apply a steady bead of waterproof caulking along the seams and edges.
- Lastly, use a damp cloth to smooth out the excess product and ensure an even application.
It is important to note that silicone-based caulks are more effective in sealing moisture-prone areas like showers.
By applying caulk around the edges, you can safeguard your bathroom from potential damage caused by moisture while maintaining its pristine condition. Don’t miss out on this easy and efficient way to protect your space.
Conclusion
Shower Splash Guard DIY: Simple and Effective Solution
Are you tired of wiping up water puddles after every shower? The solution is to make your own shower splash guard. By utilizing common household materials, you can customize a guard that will prevent water from splashing out of your shower and onto your bathroom floor.
To create a simple and effective shower splash guard, follow these easy steps:
- Take a clear plastic sheet and cut it to the size of your shower door or curtain.
- Attach the sheet to your shower door or curtain using strong adhesive tape.
Voila! Your custom-made splash guard is ready to use.
Don’t forget to replace the plastic sheet when it starts to look worn out or damaged. With minimal cost and effort, you can enjoy a dry and hassle-free shower experience.
Pro Tip: For extra protection, try using a double layer of plastic sheet or replacing the tape with a stronger adhesive. Happy showering!
Five Facts About Making Your Own Shower Splash Guard:
- ✅ Shower splash guards prevent water from escaping your bathtub or shower and damaging your floors. (Source: Team Research)
- ✅ Shower splash guards come in different sizes, materials, and designs, and they can enhance the look of your bathroom. (Source: Team Research)
- ✅ Shower splash guards can be made out of tile or plastic sheets. (Source: Team Research)
- ✅ Making shower splash guards out of tile requires specific tools like tile scribe, thin wire, saw, mortar, fork, and grout adhesive. (Source: Team Research)
- ✅ Making shower splash guards out of plastic is a quick and easy process that only requires plastic sheets and silicone-based adhesive. (Source: Team Research)
FAQs about Make Your Own Shower Splash Guard
How can I make my own shower splash guard?
To make your own shower splash guard, you can use either plastic sheets or tiles. For plastic sheets, cut two triangles and glue them down to the corners of your bathtub or shower with a silicone-based adhesive. For tiles, you’ll need to gather tools like a tile scribe, sandpaper, mortar, grout, bathroom caulk, and wood blocks. Follow the step-by-step guide above to learn how to make shower splash guards out of tile.
What is a splash guard, and how does it work?
A splash guard is a glass or plastic panel addition to a bathtub or shower that’s installed against the bathroom wall to prevent water from splashing out. Full-size splash guards have different ways of opening, while small splash guards are installed at either end of a bathtub or shower. They work by eliminating bath or shower water that shower curtains can’t handle, saving on expensive repairs caused by water leaks.
What materials can I use for a splash guard?
You can use a variety of materials for your shower splash guard, including plastic sheets, tiles, glass, or plexiglass. Plastic sheets and tiles are ideal for easy and affordable DIY shower projects. Glass and plexiglass provide a sleek and modern feel and offer a more customized solution for your bathroom. Keep in mind that each material has its own pros and cons, so make sure to choose the one that suits your needs, preferences, and budget.
What are the benefits of a shower splash guard?
A shower splash guard helps to prevent water from splashing out of your bathtub or shower, which can cause floor damage and promote the growth of mold and mildew. It also adds a modern feel to your bathroom and enhances the appearance of your shower enclosure. Additionally, splash guards are affordable, easy to install, and practical, making them a great alternative to traditional shower curtains.
How do I measure for a shower splash guard?
To measure for a shower splash guard, you’ll need to determine the length and width of the edges of your bathtub or shower that need coverage. Measure each edge separately and add an extra inch or two for accuracy and overlap. You can use a tape measure or ruler to get precise measurements and ensure that your splash guard fits perfectly.
What are some other ways to contain water inside a shower?
In addition to using a splash guard, you can slope the shower floor in the way of the drain to lead the water toward it. You can also install a shower curb or threshold to prevent water from spilling out of the shower or bathtub. Applying a waterproofing membrane and sealant to walls and floors can also help prevent water leaks and mold growth. Finally, using a shower mat or non-slip tiles can improve bathroom safety and reduce the risk of accidents.
Additional Reading
Here are some articles that provide more tips and tricks about dealing with everyday cleaning and maintenance tasks around your home:
- Getting Hydraulic Fluid Out of Clothes: Dealing with tough stains can be challenging. Learn how to remove stubborn hydraulic fluid from your clothes with this detailed guide.
- Cleaning Up Spilled Laundry Detergent: Accidents happen, and this article has got you covered. Discover practical ways to clean up those sudsy laundry detergent spills effectively.
- Washing a Polyester Blanket: Maintaining the softness and longevity of your polyester blanket involves proper care and washing techniques. This guide provides the insights you need.
- Dealing with Thigh Dirt on Toilet Seat: Toilet seats can get dirty over time. Learn how to tackle and prevent this common issue with these effective cleaning strategies.
- Eliminating the Smell of Poop on Your Skin: Handling this delicate issue requires both tact and knowledge. Explore effective methods for dealing with unpleasant odors in this helpful article.