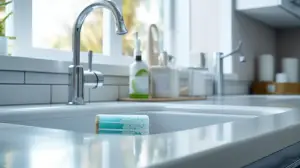
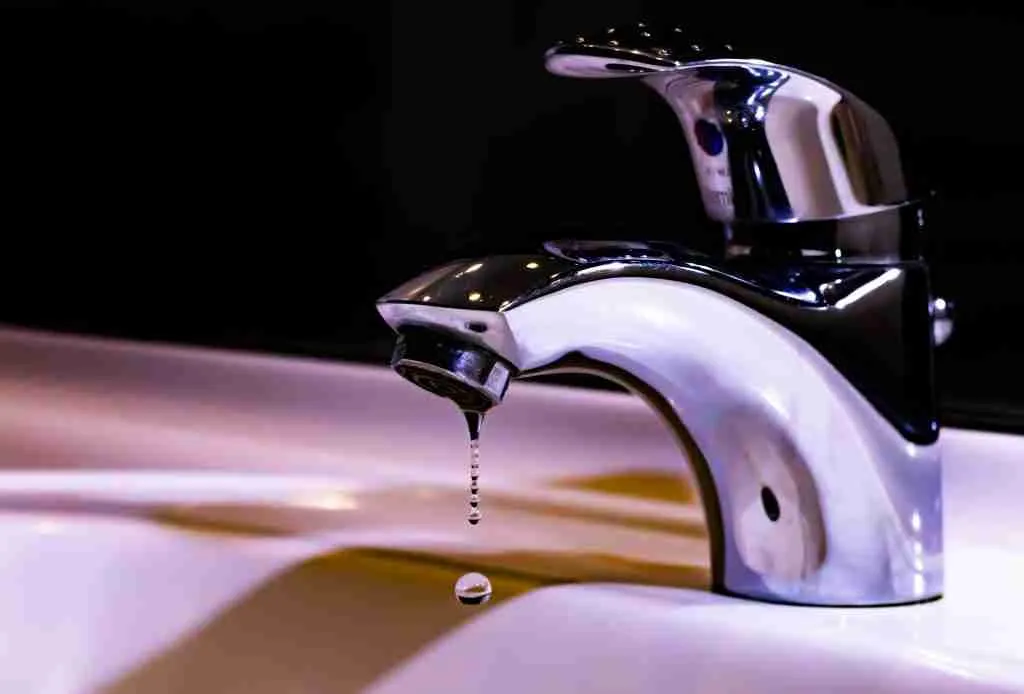
Has your peace and quiet been interrupted by the constant drip, drip, dripping of a leaky bathtub faucet, especially when you’re trying to enjoy a relaxing time in the tub? You might be surprised to discover that this minor nuisance can waste almost 700 gallons of water in a year! This easy step-by-step guide will show you how to fix a leaky faucet, save money on those pesky water bills, and restore tranquility to your bathroom.
Read on – it’s time to fix that faucet once and for all!
Key Takeaways
- A leaky bathtub faucet can waste almost 700 gallons of water in a year.
- Common causes of a leaky bathtub faucet include worn-out washers and damaged valve cartridges.
- To repair a leaky bathtub faucet, you will need tools like a handle insert pry and seat wrench, as well as new faucet parts such as washers, stems, and handles.
- Steps to fix a leaky bathtub faucet include shutting off the water supply, removing the faucet handle and stem assembly, assessing the parts for damage, replacing worn-out components like washers or stems, checking the faucet spout for leaks, reassembling the faucet securely, and testing for any remaining leaks.
- If DIY repairs don’t solve the problem or if you’re unsure about tackling it yourself, it’s best to call a professional plumber.
What Causes a Leaky Bathtub Faucet?
A tub faucet can start to leak for many reasons. One common cause is a worn-out washer. The rubber washer in a double-handled bathtub faucet may crack, corrode, or compress over time. This will lead to water dripping out of the tap even when you have closed it tight.
Another trouble spot can be the valve cartridge in a single-handle faucet. If its rubber O-rings are damaged or worn out, they won’t create a good seal. Corrosion could also be causing your problem if parts have become too rusty.
Whether due to use and wear over time, or not fitting right from the start, these issues can cause your bathtub faucet to leak.
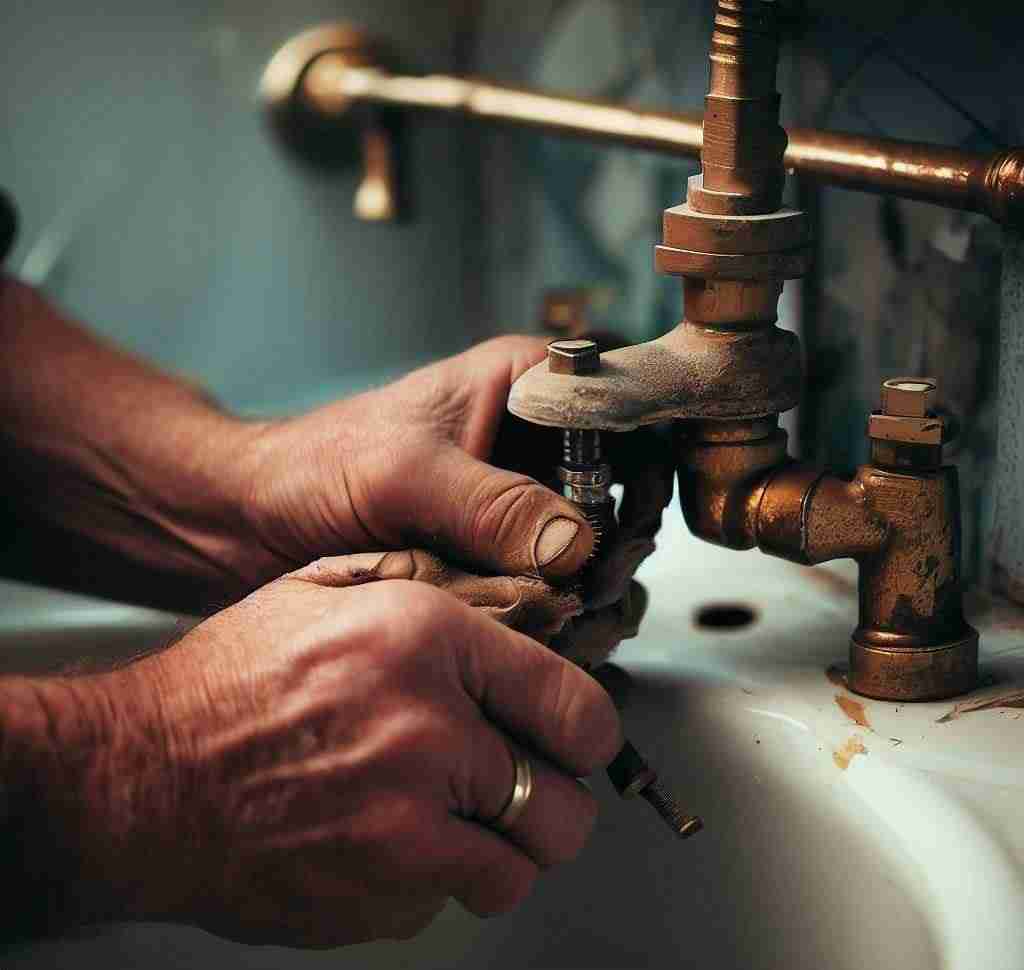
Essential Tools and Materials for Fixing a Leaking Faucet
To repair a leaky bathtub especially if it’s a bathroom faucet that controls both hot and cold water, you will need a handle insert pry, seat wrench, and new faucet parts such as a washer, stem, and handle.
Handle insert pry
A handle insert pry is a must-have tool in fixing a leaky bathtub faucet. It helps you take off the faucet handles without causing any harm. To begin, simply slip the thin end of the pry under the edge of your faucet handle.
Then, push down on the thicker end to raise up the handle.
With a good grip on the handle now, gently pull it out from its spot. Keep in mind not to use too much force or else you might break something! The Home Depot sells this useful tool among other plumbing repair supplies for such jobs at home.
Seat wrench
A seat wrench is a handy tool. You use it to fix a leaky bathtub faucet. It plays a big role when you work on a two-handle bathtub faucet. This tool helps pull out and put in the worn-out or rusted faucet seat with ease.
The adjustable wrench and screwdrivers are its best friends during this work. The new faucet seat fits right and tight, thanks to the seat wrench!
New faucet parts (washer, stem, handle, etc.)
You will need new faucet parts to fix a leaky bathtub faucet. The main ones are the washer, stem, and handle. You can buy all of these from Home Depot or any other store that sells faucet parts.
With the right tools and these new parts, you can stop your faucet from leaking in no time!
Learn How to Fix a Leaking Bathtub Faucet: Step-by-Step
To fix a leaky bathtub or shower faucet, follow these simple steps.
Shut Off the Water Supply
To fix a leaky bathtub faucet, the first step is to shut off the water supply. This is important because it prevents any more water from flowing while you’re making repairs. To do this, locate the water shut-off valve and turn it clockwise until it’s fully closed. If you’re unsure about how to turn off the water supply, you can check out this guide on how to turn off water to a toilet.
You can use an adjustable wrench to help you do this. It’s a good idea to drain the pipes after shutting off the water supply by turning on a faucet in another part of your home until no more water comes out.
By shutting off the water supply, you’ll be able to work on fixing the leak without any worries about water waste or additional damage occurring.
Remove the Faucet Handle
To fix a leaky bathtub faucet, especially if it’s a faucet with one handle, one of the first steps is to remove the faucet handle. Before doing so, it’s important to shut off the water supply to avoid any accidents. To remove the handle, you’ll need to use specific tools like an adjustable wrench or a screwdriver depending on the type of handle you have.
Once you’ve removed it, you can then proceed with assessing and replacing any necessary parts. It’s crucial to match the replacement parts correctly with your faucet model before removing the handle, ensuring a proper repair job.
If you’re dealing with stubborn water stains during this process, here’s a guide on how to remove water stains from marble.
Remove the Escutcheon Plate and Stem Assembly
To fix a leaky bathtub faucet, you’ll need to remove the escutcheon plate and stem assembly. This step is important because it allows you to access the rubber washer and faucet seat, which may be causing the leak.
To do this, use an adjustable wrench and a screwdriver to unscrew and remove the handle of the faucet. Then, locate the escutcheon plate around the base of the handle and carefully pry it off using a flathead screwdriver.
Once the escutcheon plate is removed, you can see the stem assembly beneath it. Use a seat wrench to loosen and remove the nut that holds the stem assembly in place. Take your time during this step to avoid damaging any parts.
Assess the Parts
To fix a leaky bathtub faucet, it’s important to assess the parts of the faucet. For a double-handled faucet, check if the rubber washer is cracked or corroded. This can cause leaks when water flows through the faucet.
In a single-handled faucet, examine the valve cartridge and its rubber O-rings for wear or corrosion. These parts may need to be replaced to stop leaks. Assessing the parts will help determine which components need fixing or replacing, allowing you to repair your leaky bathtub faucet effectively.
Replace the Faucet Washer
To replace the faucet washer, you will need to disassemble the faucet by removing the handle and stem assembly. Once you have access to the inside of the faucet, you can locate the washer.
Check if it is worn out or damaged, as this could be causing the leak. Use a flathead screwdriver or pliers to remove the old washer and replace it with a new one that matches its size and shape.
Make sure to position it correctly. Then, reassemble the faucet following the reverse steps of disassembly. Test for leaks by turning on the water supply and checking if any water drips from the faucet spout when closed.
Replace the Faucet Stem
To replace the faucet stem, you will need to remove the old one first. Start by turning off the water supply using the shut-off valve. Use a wrench to unscrew and remove the packing nut that holds the stem in place.
Once removed, take out the old stem and replace it with a new one of the same size and type. Make sure it fits securely into place before reattaching the packing nut. Turn on the water supply again to check for any leaks.
Replace the Handle
To replace the handle of a leaky bathtub faucet, you will need to remove the old handle first. This can usually be done by using an adjustable wrench or a screwdriver to loosen and unscrew any screws holding the handle in place.
Once the old handle is removed, you can then install the new one by following the manufacturer’s instructions. Make sure to tighten any screws or bolts securely to ensure that the handle is properly attached.
It’s important to note that if replacing just the handle doesn’t fix the leak, it may be necessary to replace other components of the faucet as well.
Check the Faucet Spout
To ensure that your leaky bathtub faucet is fully repaired, it’s important to check the faucet spout. Sometimes, leaks can occur from the spout itself due to worn-out seals or valves.
To do this, turn on the water supply and let it flow through the faucet spout. Observe if any water is still leaking or dripping from the spout even after you’ve replaced the other parts of the faucet.
If there are still leaks present, you may need to replace the entire spout or seek professional help for further assistance in fixing the issue. Checking this part ensures that all possible sources of leakage are addressed and your bathtub faucet will be fully functional again without any annoying drips.
Reassembling the Faucet and Testing for Leaks

After replacing the necessary parts, reassemble your bathtub faucet and make sure to check for any leaks. Don’t miss this crucial step in fixing your leaky faucet – find out how to properly test your repairs and ensure a fully functioning bathtub faucet.
Reassemble Bathtub Faucet
To reassemble the bathtub faucet, follow these simple steps. First, insert the stem or cartridge back into the faucet body. Make sure it fits securely and aligns properly. Next, attach the escutcheon plate over the stem assembly and screw it tightly in place.
Then, reattach the faucet handle by sliding it onto the stem or cartridge and securing it with a set screw or retainer clip if necessary. Finally, turn on the water supply valve to check for any leaks.
If there are no leaks, your bathtub faucet is now successfully repaired and ready to use again!
Check for Leaks
After reassembling the bathtub faucet, it’s important to check for leaks. Turn on the water supply and observe if any water is dripping from the faucet or spout. Listen carefully for any water-dripping sounds as well.
Additionally, you can use a tissue or paper towel to wipe around the connections and see if there are any signs of moisture. If you notice any leaks, make sure to tighten the fittings or replace any faulty parts that might be causing the issue.
Regularly checking for leaks will help you identify and fix problems before they lead to more serious water wastage and higher bills in the future.
When to Seek Professional Help for Bathtub Faucet Leaks
– If you have attempted the repairs outlined in this article and the leaking faucet persists, it is recommended to call a professional plumber.
– When dealing with complex faucet designs or specialized parts that are difficult to find, a professional can provide the expertise needed for a successful repair.
– If you do not have the necessary tools or experience with plumbing repairs, calling a professional will ensure that the job is done correctly and efficiently.
– Some leaks may be indicative of more significant underlying issues with your plumbing system. A professional can assess and address these issues to prevent future problems.
– If you are unsure about how to shut off the water supply or navigate other potentially tricky steps in the repair process, it is best to leave it to an experienced plumber.
– If you’re considering replacing your bathtub altogether, you might want to check out how much it costs to replace a bathtub.
Conclusion
Repairing a leaky bathtub faucet can save you money and prevent water waste. By following the simple steps outlined in this blog, you can easily fix the problem yourself. Remember to shut off the water supply, remove the handle and stem assembly, replace any worn-out parts, and test for leaks before reassembling the faucet.
If you’re not confident in your plumbing skills or if the problem persists, don’t hesitate to call a professional plumber.
FAQs
How do I fix a leaky bathtub faucet?
To fix a leaky bathtub faucet, you will need to replace the entire faucet stem or cartridge. First, turn off the main water supply to your bathtub. Next, use a screwdriver to remove the handle and the remaining water from the bathtub spout. Then, remove the stem or cartridge by unscrewing it from the base of the faucet. Replace it with a new faucet stem or cartridge. Finally, turn the handle to test for any remaining leaks.
What is the cause of the leak in my bathtub faucet?
The most common cause of a leaky bathtub faucet is a worn-out or faulty faucet stem or cartridge. Over time, the interior components of the faucet can break down, leading to dripping or leaking water. This can also be caused by a new seat that is not pushed against the valve properly. If you notice water wasted by a leaking bathtub faucet, it is important to repair it as soon as possible to prevent further damage.
Can I fix a dripping bathtub faucet without calling a professional?
Yes, fixing a dripping bathtub faucet is typically considered an easy fix that can be done without calling a professional. By following the proper steps and using the right tools, such as a screwdriver, you can replace the seat or the entire faucet stem or cartridge and stop the faucet from dripping.
How much water can be wasted by a leaking bathtub faucet?
A leaking bathtub faucet can waste a significant amount of water over time. The exact amount of water wasted will depend on the severity of the leak and the time the water is turned on. However, even a small drip can add up to hundreds of gallons of water wasted each year, resulting in higher water bills and unnecessary water usage.
Should I replace the entire faucet or just the stem?
Whether you should replace the entire faucet or just the stem depends on the specific situation. If the faucet is old or worn out, it may be more cost-effective and efficient to replace the entire faucet. However, if the faucet is relatively new and only the stem or cartridge is causing the problem, you can simply replace the stem or cartridge.
Can I repair a leaky bathtub faucet myself?
Yes, you can repair a leaky bathtub faucet yourself by following the proper steps. This involves turning off the main water supply, removing the handle and stem, replacing the faulty parts, and reassembling the faucet. With the right tools and knowledge, repairing a leaky faucet can be a DIY project.