Key takeaway:
- Fabric softener can be the main culprit behind dark stains on clothes after washing. Using too much fabric softener or not diluting it properly can lead to the formation of dark stains on clothes.
- Other possible causes of dark stains include oil leaks, rust stains, detergent stains, bleach stains, dye transfers, foreign objects, mold or mildew, and hard water content. It is important to identify the specific cause in order to effectively treat the stains.
- Preventive measures to avoid dark stains include cleaning your washing machine regularly, using the correct amount of detergent and fabric softener, separating and treating oil-stained clothing, emptying pockets before washing, considering specific cleaning procedures for different types of clothing, switching to gentler laundry products, and checking for rust in the drum and piping.
Introduction
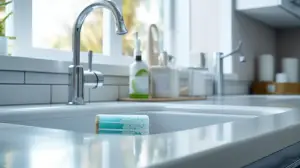
Has your laundry day ever turned sour by the sight of unexpected dark stains on your freshly washed clothes? You’re certainly not alone in this predicament!
In this enlightening section, we’ll be your laundry detectives, taking a deep dive into the perplexing mystery of these unwelcome stains. We’ll traverse the landscape of possible causes, peek into specific cases, and dig into the factors that might be playing a sneaky role in this stain game.
By shedding light on what’s causing these blemishes, we can empower ourselves to take steps to keep them at bay and protect the sanctity of our favorite outfits. Now, isn’t that a laundry win? Let’s get started on this stain-busting journey!
Why are there dark stains on clothes after washing?
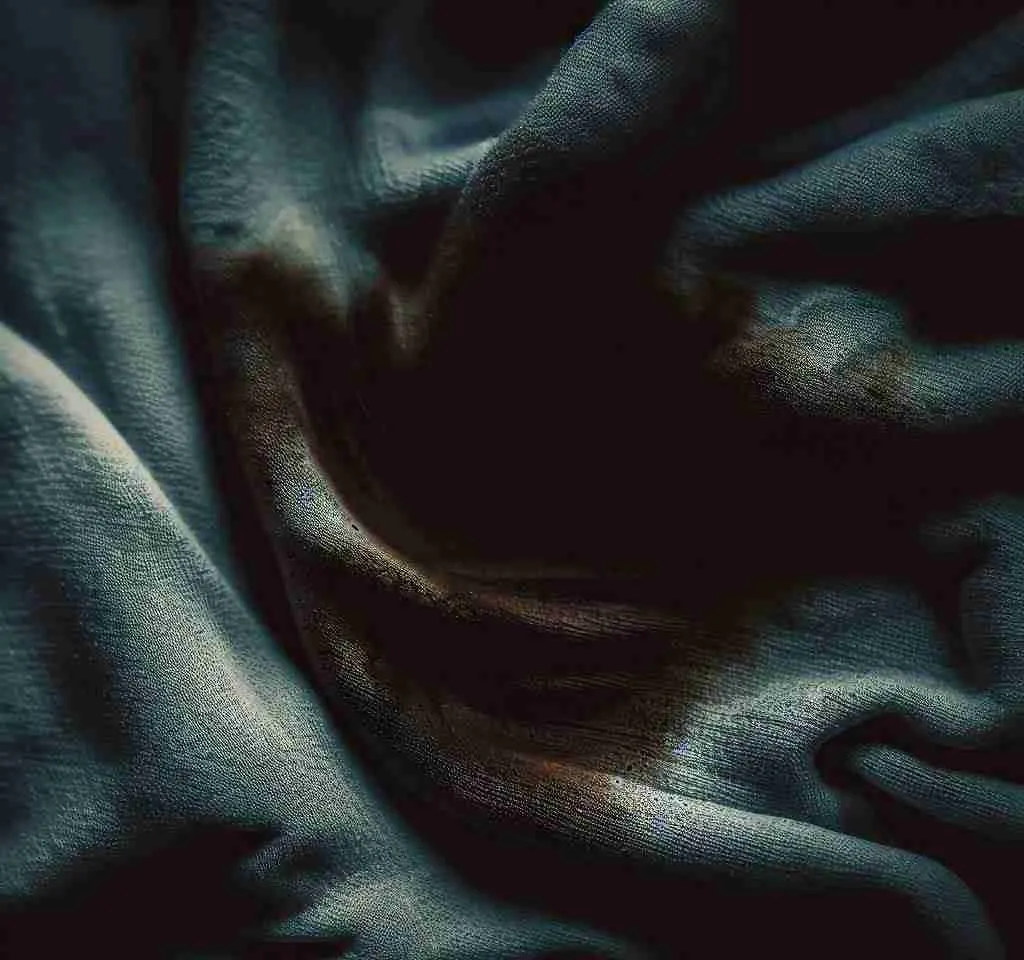
Now, this might make you scratch your head: Why are there random dark stains showing up on your clothes after washing? Let’s clear the fog and look at a few usual suspects.
The number one offender often is the fabric softener – it can leave behind residue that masquerades as dark stains. Then there are other culprits like pesky oil leaks, stubborn rust stains, blotches from detergent or bleach, and dye transfers. Sometimes, you might have unknowingly left a foreign object in your pocket, or mold and mildew could be taking a joy ride, or even hard water might be throwing a curveball at you.
So, how can you wave goodbye to these unwelcome stains? For starters, giving your washing machine a good clean-up now and then and measuring your detergent and fabric softener accurately can work wonders. Dealing with oil-stained clothes separately, always remembering to empty your pockets before washing, and understanding how different clothing types need unique care can save your day. You might also want to experiment with gentler laundry products and keep an eagle eye out for any signs of rust in the drum and pipes.
Speaking of rust stains, if they’ve decided to play house in your washing machine, then vinegar or lemon juice can serve as good eviction notices. For extreme cases, you might have to show rusted pipes the door, replacing them entirely. And yes, don’t forget to show some love to your washer drum – give it a nice cleanup with some commercial cleaning products or home heroes like white vinegar or bleach. Make sure to remove the agitator and clean underneath it for an extra layer of freshness. And if rusting iron pipes are the troublemakers, it’s best to call in a professional to do the replacement job. In the rare event where none of these steps work, reach out to the manufacturer or a laundry pro for some tailor-made advice.
Tackling those dark stains post-wash can feel like a daunting game of hide and seek. But with a bit of detective work and the right measures, you’ll be back to seeing clean and stain-free laundry in no time. So, are you ready to outsmart those dark stains? Let’s get on it!
Causes of Dark Stains on Clothes After Washing

Ever noticed those pesky dark stains gatecrashing your clothes after a good wash? It’s enough to leave you scratching your head, right? You’re not alone in this. Turns out, there’s a motley crew of likely suspects behind this laundry mystery.
Fabric softeners, for instance, are a common bad guy. But they’re not the only ones stirring up trouble. Your laundry could be getting a rough time from oil leaks, rust, detergent, bleach, and even dye transfers. Sometimes, it could be something as random as a forgotten item in a pocket or a sneaky mold or mildew having a ball. And let’s not forget hard water – it too can play its part in this murky saga.
Sounds like quite a lineup, doesn’t it? So let’s roll up our sleeves and dive into these different causes, unmasking them one by one. Together, we’ll get to the bottom of how they leave their unwanted autographs on our freshly washed clothes. Ready? Let’s get cracking!
Fabric softener as the main culprit
Ever thought something as innocent as fabric softener could be the villain in our laundry story? Surprisingly, it tops the list of offenders causing those stubborn dark stains on clothes after washing. Despite its usual job of making our clothes snuggly soft and static-free, fabric softener can sometimes leave behind a frustrating souvenir – residue.
Here’s how it goes down: fabric softeners, especially those with oils or waxes, can deposit a residue on our clothes during the wash. This residue may play hide and seek, not showing up until after your clothes are dried. And here’s the kicker – these marks are stubborn little things, often needing special cleaning moves to completely bid them goodbye.
So, how do we keep fabric softener in check? Start by following the Goldilocks principle – not too much, not too little, just the right amount of softener as recommended by the maker. Going overboard can lead to a greater build-up of residue, raising the stain risk. Also, picking a softener that’s free of oils and waxes might help keep those stains at bay.
But remember, our laundry mystery has more than one suspect. Oil leaks, rust, detergent, bleach, dye transfers, mystery objects, mold, mildew, and hard water can also throw their hat in the ring. The key to cracking the case? Identifying the real culprits. Now, are you ready to unravel the dark secrets of stains that seem to ghost your freshly washed clothes? Let’s go!
Other possible causes
Now, fabric softener isn’t the only sneaky culprit behind those annoying dark stains on your clothes after washing. We’ve got a whole lineup of potential offenders, including oil leaks, rust stains, detergent and bleach mishaps, dye transfers, mysterious foreign objects, stubborn mold or mildew, and even hard water.
The key to tackling these tricky troublemakers is, first and foremost, detective work. Yep, you’ve got to identify who’s causing the mess to clean it up effectively.
Here are some laundry hacks to outsmart these stains:
- Be vigilant with your washing machine. Keep it spick and span by regular cleaning and using the right amount of detergent and fabric softener. Treat it right, and it’ll return the favor.
- If your clothes have oil stains, deal with them individually before you toss them in the wash. This way, they won’t play tag with your other clothes.
- Emptying pockets before washing is non-negotiable. It’s amazing what we can unknowingly launder – coins, pens, receipts – all potential stain villains.
- Keep in mind that different fabrics have different needs. Giving them the right care can help prevent dye transfers and other stains.
- Consider switching to gentler laundry products. They can be kinder to your clothes and less likely to leave behind pesky stains.
And if rust is your nemesis, here are some rust-busting tips:
- Vinegar or lemon juice can be your trusty sidekicks for removing minor rust stains in the washing machine drum or pipes.
- For severe rust issues, it might be time for a pipe makeover. It’s a job best left to the professionals to ensure a safe and effective replacement.
- A sparkling clean washing drum is a must. Try using commercial cleaning products or even home staples like white vinegar or bleach. Don’t forget to give the door seal and drainage holes a good scrub too!
- For a comprehensive clean, consider removing the agitator from your washing machine. It gives you better access for a thorough clean, improving your overall laundry results.
Despite all these tactics, if those dark stains remain as stubborn as a mule, don’t hesitate to call in the experts. Whether it’s the manufacturer or a laundry professional, they can offer valuable insights to banish those stains once and for all.
In the battle of keeping our clothes pristine, a clean washing machine is our strongest ally. After all, it’s not just cleanliness that’s next to godliness, a stain-free wardrobe is pretty divine too!
| Causes of Dark Stains on Clothes After Washing | Possible Culprits |
|---|---|
| Fabric softener residue | Fabric softener |
| Oil leaks | Grease buildup from laundry or fabric softener |
| Rust stains | Chipped enamel on the drum or dispenser |
| Detergent stains | Accumulated soap scum |
| Bleach stains | Bleach or laundry stain removers |
| Dye transfers | Different colored stains that may be dye transfers |
| Foreign objects | Objects left in pockets or other items in the washer |
| Mold or mildew | Accumulated mold or mildew inside the washing machine |
| Hard water content | Hard water causing stains or buildup |
Preventive Measures to Avoid Dark Stains

Let’s talk about some savvy tips to kick those pesky dark stains to the curb and keep your clothes looking sharp wash after wash.
Cleaning your washing machine regularly is your first line of defense. It’s like a spa day for your washer; it will not only feel good but also perform better and avoid depositing any grimy residue onto your favorite tee.
Keep an eye on your detergent and fabric softener usage. Too much of a good thing can turn bad pretty quickly, leading to unsightly buildup that might stain your clothes. Stick to the recommended amounts for happy laundry days.
Got an oil-stained shirt? Give it some special pre-wash attention. Treating it before tossing it in with the rest of your laundry can save you from a world of staining woes.
Let’s talk pockets. They’re handy for storing things on-the-go, but can be a real party pooper in the laundry. Empty them out before each wash to prevent any forgotten items from ruining your clothes.
Remember, not all clothes are created equal. Some may require special cleaning procedures, so always check and follow those little tags for any specific instructions. It’s their way of saying, “Handle me with care”. If you have specific materials like polyester, they need special attention. Check out our guide on how to wash a polyester blanket.
If you’re battling with stains frequently, consider a tactical switch to gentler laundry products. They’re like the knights in shining armor for your delicate fabrics.
Lastly, don’t ignore rust – in your drum or pipes. It’s not just an eyesore but can leave ugly marks on your clothes. Regularly check and clean any rust spots to avoid this.
Incorporate these steps into your laundry routine, and you’ll be winning the war against dark stains. After all, life’s too short for bad laundry days!
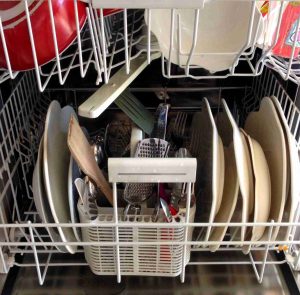
Clean your washing machine regularly
Caring for your washing machine is a lot like maintaining a classic car – it needs regular tune-ups to stay in tip-top shape. And if you’re seeing dark stains on your clothes after washing, your machine might just be crying out for a little attention.
So, let’s buckle up for a quick 4-step joyride on how to keep your washing machine squeaky clean:
- Choose Your Cleaning Ammunition: Just like you’d pick the right oil for your car, choosing the right cleaning solution for your washing machine is crucial. You can go for commercial drum cleaning products or household items like white vinegar or bleach.
- Show the Interior Some Love: It’s time to roll up your sleeves and clean the drum, door seal, and drainage holes. Think of it as a mini car wash for your machine, getting rid of any gunk that can lead to annoying stains.
- Don’t Forget the Agitator: If your washing machine has an agitator, it’s like the engine under the hood. Remove it carefully and clean underneath to wash away any hidden residue that might be lurking.
- Be on the Lookout for Rust: Rusty pipes can be the culprits behind those mysterious stains. Regularly check your machine’s pipework for any signs of rust. If you spot any, it might be time to call in the pros for a replacement.
In the spirit of sharing, let’s recount a little tale of a friend who was baffled by persistent dark stains on their clothes. It turned out, their neglected washing machine was the villain of the story! After seeking professional advice and sticking to a thorough cleaning routine, their clothes returned to their unstained glory.
In the end, the moral of the story is simple: your washing machine needs regular TLC to keep your clothes stain-free and fresh. By staying on top of maintenance, you’ll also be giving your appliance a longer, happier life.
Speaking of cleaning, if you’ve ever wondered whether hydrogen peroxide is a safe choice for your fabrics, check out our article about whether hydrogen peroxide bleaches clothes.
Use the correct amount of detergent and fabric softener
You know what they say, too much of a good thing can be bad. This holds true when it comes to using detergent and fabric softener. When you pour too much of these goodies, it can backfire, leaving dark stains on your clothes after washing. But don’t worry, here’s your cheat sheet on how to hit the sweet spot:
- Respect the Rules: Your detergent and fabric softener packaging is like a mini instruction manual. It tells you exactly how much to use for optimal results. So, ditch the guesswork and stick to what the pack says. No more, no less!
- Adjust for Hard or Soft Water: The hardness of your water plays a big role in how your detergent performs. Hard water is like a tough crowd – it needs more detergent to break through and clean effectively. On the other hand, soft water plays well with less.
- Mind the Load: The amount of detergent and fabric softener you need also depends on the size of your laundry load. It’s a bit like cooking for a party – the number of guests (or in this case, clothes) determines the quantity of ingredients.
Fun Fact: The detergent and fabric softener dilemma has been a long-standing laundry saga. There have been countless tales of too much, too little, and everything in between. But thanks to clear instructions on the packaging, it’s now easier than ever to hit the bullseye.
So, remember, when it comes to detergent and fabric softener, less is often more. Get the balance right and you’ll have clothes that are as clean and fresh as a spring morning, with no dark stains in sight.
As you measure out your detergent, you might wonder if it has an expiration date. Find out in our article about whether laundry detergent expires.
Got oil stains? Just separate those oil-soaked threads from your other clothes as if they’ve just had a heated argument. Give them some solo treatment, and soon they’ll be back to their best.
Separate and treat oil-stained clothing
Ever get that sinking feeling when you pull out a favorite shirt from the wash, only to find a greasy oil stain glaring back at you? We’ve all been there, and I’ve got good news for you – with these simple steps, you can say goodbye to those oil stains for good:
- Sort it Out: Just like you’d separate whites from colors, you’ll want to keep oil-stained clothes separate from the rest of your laundry. Why? Because oil can be a sneaky little thing and can spread to other clothes in the wash.
- Apply Some Elbow Grease: Here’s where you get proactive – apply a stain remover or a mild detergent directly onto the oil stain. Gently rub the fabric to help the product break down the oil. Think of it as a mini massage for your clothes.
- Turn Up the Heat: When it’s time to wash, crank up the water temperature to hot. Just like a well-cooked meal, warm water can help dissolve stubborn oil and grease. Use a quality detergent that’s designed for tough oil and grease stains for best results.
- Be Gentle with Delicates: Got oil stains on delicate fabrics like silk or wool? These finicky materials might prefer a handwash in lukewarm water with a mild soap.
Remember, oil stains are like uninvited guests – the sooner you address them, the easier they are to get rid of.
And if you’re dealing with tougher stains like hydraulic fluid, we’ve got you covered. Here’s how to get hydraulic fluid out of clothes.
A pro tip: always check your pockets before throwing clothes in the wash. It’s like a treasure hunt, but without the fun – you never know what you might find!
Empty pockets before washing
Do you know what’s worse than finding a hundred-dollar bill in your jeans after washing them? Okay, maybe nothing tops that, but finding a disintegrated tissue, a melted candy bar or an ink-stained mess is pretty high up there on the laundry disaster list.
Before you toss your clothes into the washer, take a quick detour – it’s time for a pocket check!
- Check for hidden treasures: From receipts to paper clips, even the smallest items can leave a big mess on your clothes. Make it a rule to check all pockets thoroughly before throwing your clothes into the wash.
- Pay attention to the fabric: Different fabrics require different care. If you’re dealing with delicate ones like silk or lace, you might want to be extra gentle while poking around in those pockets.
- Develop a ‘pre-laundry’ habit: Here’s a quick hack – make it a habit to check your pockets before undressing. This way, you’re less likely to forget.
By following these steps, you can save your clothes and washing machine from the perils of overlooked pocket contents. Plus, you won’t have to deal with the unpleasant surprise of dark stains on your favorite outfits.
Besides items in your pocket, surface stains like chalk can also affect your laundry. Learn if chalk comes out of clothes in our other article.
Special treatment for special clothes? Absolutely! Different fabrics need different TLC when it comes to stain removal.
Consider specific cleaning procedures for different types of clothing
If dark stains on your clothes after washing are giving you a headache, it’s time to reconsider your laundry products. Switching to gentler, more fabric-friendly options could be the game-changer you’ve been looking for.
But how do you get started? Here’s a quick guide:
- Know your fabric: Just like people, fabrics have unique personalities too. Check the care labels to understand what treatment your clothes need.
- Sort it out: Arrange your clothes by fabric type and color before you start. This way, you can prevent any unpleasant surprises, like color bleeding or shrinkage.
- Choose wisely: Detergents aren’t one-size-fits-all. For delicate fabrics, opt for mild detergents that are kinder to the fibers.
- Follow the rules: Use the right water temperature and cycle setting for each fabric type. If you’re unsure, always stick to the cooler side and gentler cycles.
By following these simple steps, you’ll not only protect your clothes from potential damage but also extend their life. Because every garment is unique, make sure to double-check any specific care instructions or seek professional advice if needed.
Remember, the secret to spotless laundry isn’t about being tough on stains, it’s about being gentle on fabrics. Happy washing!
Iron pipes making your clothes look rusty? No worries, let’s give that old plumbing a makeover!
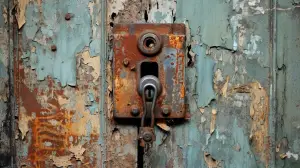
Check for rust in the drum and piping
Battling the mystery of dark stains on your clothes? Rust could be the surprise villain! Fear not, a regular check-up of your washing machine can help keep those rust monsters away.
- Take a quick look: Regularly pop open the lid and inspect your washing machine drum and pipes for any unwelcome signs of rust. Watch out for any reddish-brown stains or off-color patches, those are the usual suspects.
- Deal with the rust ASAP: Don’t let rust throw a wrench in your laundry routine. If you spot any, act fast. Call in a pro or tackle it yourself, just make sure to handle it sooner rather than later to avoid more stains.
- A tip to keep in mind: your washing machine is like your car – regular check-ups and maintenance can keep it running smoothly and prevent any major breakdowns. Plus, you get the bonus of stain-free clothes!
Rust making an appearance in your washing machine doesn’t have to be a headache. Remember, with a little care and attention, you can keep your machine, and your clothes, looking their best.
As they say, ‘Prevention is better than cure.’ So, no more dark stains on your clothes, let’s keep them fresh and clean with a rust-free washing machine! Cheers to happy laundry days!
Consider using a gentle vinegar or lemon juice solution to combat those rust stains. Trust me, your clothes will thank you!
Removing Rust Stains from Inside the Washing Machine

Warding off dark stains from your clothes after washing can often be as simple as addressing a pesky culprit hiding within your washing machine – rust. Yes, rust within your washing machine can lead to unwelcome stains transferring to your clothes during the wash.
But, don’t worry! We’ve got you covered with two practical strategies to kick rust stains to the curb and keep your laundry days as stress-free as possible. We’ll be harnessing the power of nature, using vinegar or lemon juice as natural cleaning wizards, and discussing the importance of bidding farewell to any rusty pipes. With these handy tips, you’re on your way to a rust-free, stain-free laundry routine. Let’s dive in!
Using vinegar or lemon juice
Turn to Mother Nature for help in battling dark stains on your clothes after washing. Two allies in this fight? Vinegar and lemon juice. Here’s why these natural cleaning agents pack a punch:
- Acidity is key: Vinegar and lemon juice’s acidic properties can work wonders in dissolving and banishing stains from fabrics.
- Pre-soak to the rescue: Create a pre-soak solution with water and either vinegar or lemon juice. Give your stained clothes a good soak before sending them off to the washing machine.
- Rinse cycle heroes: Add vinegar or lemon juice directly to the rinse cycle in your washing machine. Voila! You’ve got a natural fabric softener.
- Freshen up: Besides stain-fighting, these natural cleaning agents also work as fantastic odor neutralizers. Expect your clothes to come out smelling fresher than a spring morning.
Remember, while vinegar is a great stain-fighter, it might not play well with all types of fabrics. Always do a spot test before using it on delicate or sensitive materials.
By experimenting with vinegar or lemon juice, you can discover an affordable, eco-friendly approach to effective stain removal. Keep your fashion-forward style free from the grasp of rusty pipes – replace them when needed and keep your clothes looking their best!
Replacing rusted pipes if necessary
Preventing those dark laundry stains might mean rolling up your sleeves and dealing with some rusty pipes. If that’s the case, here’s a simple, stress-free guide on how to handle it:
- Inspection Time: Get up close and personal with your washing machine pipes. If you see rust, leaks, or any signs of deterioration, it’s a clear signal for a pipe replacement.
- Call in the Experts: Changing rusty pipes can be tricky, and that’s when you should consider calling a professional plumber. They’ve got the tools and the know-how to remove those old pipes and install new ones safely and effectively. Here are some basics on plumbing a basement bathroom that you might find interesting.
- Quality Over Everything: When it comes to replacing those old pipes, don’t skimp on quality. Go for rust-resistant materials like stainless steel or PVC to ensure your washing machine’s smooth operation and longevity. If you’re interested in how to turn off water to your toilet when dealing with plumbing, you can check out this article.
Remember, along with replacing rusted pipes, regular cleaning of your washing machine and using the right cleaning agents are your best bets to prevent dark stains on clothes. Tackling rust promptly can save your clothes from uninvited stains and keep your washing machine in top shape.
Cleaning the Washer Drum to Remove Stains
Nobody wants their clean clothes to come out of the washer with dark, uninvited stains. To prevent this, give your washer drum some love and attention! Let’s walk you through some easy and effective methods to keep your washer drum squeaky clean.
Think of commercially available drum cleaning products as your new best friends. These handy helpers can give your washer drum a thorough and much-needed cleanse.
Too fancy? No problem! Everyday household items like white vinegar or bleach can also come to the rescue. A dash here, a splash there, and voila! Your drum is clean as a whistle.
But don’t stop there! Remember to give the door seal and drainage holes a good wipe too. You don’t want those stains sneaking back in the next time you do laundry.
So, put on those rubber gloves, grab that scrubbing brush, and show your washer drum some cleaning magic. Your clothes will come out looking and smelling fresher than ever!
Commercially available drum cleaning products
To really get your washer drum spick and span, commercially available drum cleaning products are a game changer. Here’s why:
- Ease of Use: Just pop them in, run a cycle, and let them do their thing.
- Deep Clean: These super cleaners break down even the toughest dirt and grime lurking in your drum.
- Anti-Microbe Power: They’ve got built-in microbe fighters to help zap away bacteria, mold, and mildew.
- Smell Fresh: They don’t just clean; they leave your washing machine smelling fresh and clean. Bonus!
There’s a smorgasbord of options available, so you’re sure to find the one that fits your washing needs. Regularly using these drum cleaners keeps your washing machine humming along beautifully and your clothes looking their best.
Remember, always follow the manufacturer’s instructions to keep your machine safe and sound. Including these cleaners in your regular washing routine helps keep buildup and nasties at bay, which means less stress for you and your machine.
Fun Fact: Washing machine cleaners have taken the world by storm! Recognizing the need for keeping washing machines clean, companies have developed a slew of these specialty products, each with unique features like anti-microbial properties. They’ve become a hit in households worldwide, keeping washing machines clean, efficient, and ready for action.
But if commercial cleaners aren’t your thing, don’t worry! There are other easy-peasy alternatives you can use, like white vinegar or bleach. After all, everyone loves a good home appliance detox!
Alternatives: white vinegar or bleach
Chasing away those annoying dark stains on clothes after washing doesn’t always call for fancy commercial cleaners. Simple home heroes like white vinegar or bleach can also do a pretty fantastic job. Let’s see how:
- White Vinegar: It’s not just for salads! The acidic power of white vinegar makes it a champ at tackling stains from rust or hard water. It breaks down mineral deposits and dissolves residue, leaving clothes looking and smelling fresh.
- Bleach: Everyone’s go-to for stain lifting and disinfecting. It can banish stubborn stains like dye transfers or even bleach stains. But remember, it’s potent stuff, so handle with care and use it correctly to avoid any fabric disasters.
Just a note, when using white vinegar or bleach, always follow the right steps: dilute them correctly, don’t let them sit for too long, and make sure they’re fabric-friendly.
And speaking of fabrics, always check to see how they react to white vinegar or bleach. Each fabric is unique and may need a different approach – some like it gentle, others can handle the tough stuff.
Safety first! Always remember to wear protective gloves, keep your working area well-ventilated, and follow the manufacturer’s instructions closely.
Each stain removal journey may be unique, so if you find yourself up against a tough challenge, don’t hesitate to seek professional advice.
Adding these simple alternatives to your cleaning routine can give your clothes the pristine look they deserve. Explore the cleaning power of white vinegar or bleach and make laundry day less of a chore. After all, your washing machine is here to do the dirty work and keep your wardrobe shining bright!
Properly wiping and cleaning the drum, door seal, and drainage holes
Keeping your washer spick and span isn’t just about the clothes – the drum, door seal, and drainage holes also need a little love. Letting dirt and grime build up in these areas is like giving an open invitation to those stubborn dark stains on your freshly washed clothes. But worry not, because here’s a simple step-by-step guide to help you keep your washing machine in top shape.
- Safety first! Unplug your washing machine from the power source.
- Make a mild cleaning solution with warm water and a dash of mild detergent or a washer-friendly cleaning product.
- Now, let’s tackle the drum. Using a soft cloth or sponge dipped in your cleaning solution, give the drum a good wipe down. Pay special attention to areas that touch your clothes.
- Next up, the door seal. Wipe it gently using a damp cloth or sponge, ensuring all the hidden nooks and crannies are dirt-free.
- Lastly, it’s time for the drainage holes. Using a small brush or toothbrush, sweep away any debris that might be blocking the flow of water.
Just like brushing your teeth, regular cleaning of your washer’s drum, door seal, and drainage holes is crucial. These often overlooked areas play a key role in keeping your clothes bright and clean.
And here’s a bonus tip: To keep your washer fresh and prevent mold from gatecrashing, leave the washer’s door open between uses. This helps air out the drum and other hard-to-reach areas like the rubber gasket or door seal.
Remember, a clean washer is a happy washer, and a happy washer means perfectly clean clothes! So, let’s roll up our sleeves and get cleaning!
Removing the Agitator for Deep Cleaning
Frustrated with those stubborn dark stains on your clothes after a wash? Well, it might be time to roll up your sleeves and go for a deeper clean. And by deeper, we mean getting to the very heart of your washing machine – the agitator.
In this part, we’ll walk you through how to safely dislodge the agitator, revealing the hidden nooks and crannies where dirt likes to throw secret parties. Once we’ve busted these grime gatherings, we’ll get down to the real deal – giving the underbelly of the agitator a good scrubbing. You’ll be left wondering how you ever lived without this level of cleanliness. Let’s get started, shall we?
Safely removing the agitator
Roll up your sleeves, friends, we’re diving into the nitty-gritty of your washing machine.
- Disconnecting power and water sources to your washer is the first step – safety first, always!
- Once that’s taken care of, it’s time to tackle any obstacles on the road to the agitator, like a pesky fabric softener dispenser or a cap that’s just begging to be removed. With those out of the way, you can get down to business.
- Next, arm yourself with the right tools and carefully coax the agitator from its snug base, being sure not to upset any of the surrounding parts. It might be a little resistant, but with some gentle persuasion, it’ll come right off.
By following these steps, you’re setting yourself up for success in deep-cleaning your machine. This will help you combat those stubborn stains that seem to cling to your clothes, no matter how many wash cycles they go through.
True Story Time: A friend of mine was at wit’s end with dark stains plaguing their laundry after every wash. After what felt like a gazillion troubleshooting attempts and various failed solutions, the culprit was finally revealed – a dirty agitator. Who would’ve thought, right? Turns out, this simple process of removing and cleaning the agitator made all the difference.
So, folks, gear up to bid adieu to those dark stains and say hello to spotless clothes. Remember, when it comes to clean laundry, agitation is the key!
Cleaning underneath the agitator to improve laundry cleanliness
Right, so you’ve got the agitator out of the way, and it’s time to play detective, unearthing hidden dirt and residue under the agitator. Doing so helps ensure your clothes come out sparkling clean and free from pesky stains. So, let’s get to it with a six-step plan to make your washing machine spick-and-span!
- First off, remember to unplug your washing machine and disconnect the water supply – safety first!
- Next, you’re going to take off any items crowning your agitator like fabric softener dispensers or stubborn caps.
- Once that’s done, the stage is set for the main event – removing the agitator. You can unscrew it or use a fancy tool, as recommended by your machine’s manufacturer.
- Now comes the fun part – giving the underbelly of the agitator a proper scrub. Using a soft brush or cloth soaked in warm soapy water, make sure you get into all the nooks and crannies.
- Rinse off the agitator thoroughly, ensuring all the soap and grime are washed away.
- Lastly, it’s time to put the agitator back in its place, make sure it’s secure, and reconnect your washing machine.
Regularly cleaning underneath the agitator ensures that your clothes come out looking their best, free from any unwelcome dark stains.
A friendly reminder – ignoring this area could reduce the efficiency of your washing machine and may lead to damage over time.
Replacing Pipework to Eliminate Stains

Alright, here’s the game changer – replacing those grumpy old iron pipes! If your clothes are emerging from the washer with mysterious dark stains, the culprit might be your home’s aging pipework. The old iron pipes can rust, and this rust can make its way into your wash, leaving behind those annoying marks on your favorite shirt or jeans.
The solution? Out with the old and in with the new! Swapping out those old pipes for new ones can help you say goodbye to those pesky stains for good. You’ll be tackling the problem at its root and scoring a laundry victory.
Here’s a pro tip: it’s a good idea to bring in the professionals for this job. Trust me, they know what they’re doing and can ensure the new pipes are installed correctly. Plus, it saves you from potential DIY disasters (we’ve all been there!). So, you get to sit back and relax while your home gets a plumbing upgrade.
Recognizing the need to replace old iron pipes prone to rusting
Let’s talk about old iron pipes – the hidden enemy in the war against laundry stains. These grumpy guys can rust over time and, before you know it, their rusty tears are dripping into your wash, creating those pesky dark spots on your clothes.
The secret to handling this problem? Knowing when it’s time to kick the rusty pipes to the curb and say hello to a shiny new plumbing system. Keep a keen eye on your clothes; if you notice any unwelcome rusty guests, it might be a tell-tale sign that those iron pipes are past their prime.
Remember, this issue is especially common in older homes, where those iron pipes might have been sitting for years, rusting away silently. Regular inspections can help you spot any warning signs before they turn into big-time plumbing problems.
When you decide it’s time for a pipe upgrade, don’t hesitate to call in the pros. They’ve got the skills and tools to get the job done right, leaving you with a reliable, rust-free plumbing system. Plus, you get to sit back and enjoy the show, rather than wrestling with rusty pipes yourself.
Hiring a professional for safe and effective pipe replacement
Think of it like this – dealing with rusty old pipes is kind of like wrestling a stubborn, oversized octopus. It’s a tricky, messy job, and it’s certainly not for the faint of heart. That’s where the pros come in, swooping in with their cool gadgets and industry know-how to make everything right again.
When it comes to replacing those worn-out iron pipes that have been silently rusting away, causing those dark stains on your clothes, there’s no better solution than bringing in a professional plumber. These folks are like superheroes of the pipe world. They can spot the problem, devise a plan, and get to work faster than you can say “laundry day.”
Not only do they bring years of experience and a wealth of knowledge to the table, but they also have all the right tools for the job. So, you can say goodbye to DIY disasters and hello to a safe, effective solution. It’s all about ensuring your pipes are replaced correctly and safely, leaving you with spotless clothes wash after wash.
So, if those stubborn stains have got you tearing your hair out, don’t despair! Bring in the cavalry, let the pros take care of it, and sit back as your laundry worries wash away.
Consulting the Manufacturer or Laundry Professional
Alright, if you’ve tried everything and those stubborn dark stains on your clothes are still partying like it’s 1999, it’s time to call in the big guns. Yes, we’re talking about the manufacturers or laundry professionals – those mystical beings who live and breathe washing machines and spotless clothes.
Sometimes, no matter how much we scrub, soak, and squint at those pesky stains, they just don’t seem to get the memo. That’s when we turn to the people who make the machines or the folks who’ve made laundry their life’s work.
So, let’s put on our detective hats, roll up our sleeves, and delve into the nitty-gritty details of what could be causing these clothing calamities. Trust me, by reaching out to these seasoned pros, we’re likely to unearth those game-changing nuggets of knowledge that’ll have us waving goodbye to the era of stained laundry. Let’s get to it!
Seeking assistance when all other methods have been exhausted
Alright, you’ve given it your best shot. You’ve scrubbed, wiped, rinsed, and repeated. But those stubborn dark stains on your clothes are still sticking around like unwanted party guests. It’s time to call in the pros.
Don’t fret. When the going gets tough, the tough get expert help. It’s time to turn to the washing machine wizards – your machine’s manufacturer or a seasoned laundry pro. These folks have seen it all, and they’re here to crack your case wide open.
These wizards of wash not only have the right spells (aka tools) but also the extensive laundry lore to diagnose what’s causing the mysterious dark stains on your clothes after washing. They’ve got the knack to look at a stain and say, “Aha! I’ve seen this before.”
What’s more, their advice is specifically tailored for your predicament – considering your washing machine model, the type of fabrics you wash, and even the laundry products you use. So, trust in their guidance, as it could save you from more frustrating laundry days.
Remember to arm yourself with all the details of your washing woes when you consult these experts. It’s just like visiting the doctor – the more they know about what you’ve tried and observed, the better they can help you.
Cracking the case of the persistent dark stains? Now that’s what we call a successful laundry day! Unraveling laundry mysteries, one stain at a time, because your outfits deserve to be the stars of the show, not victims of a laundry mishap.
Gaining insights into the issue and available remedies
Battling those relentless dark stains on clothes after washing? It’s time to put on your laundry detective hat and dig into the root of the problem. Knowing exactly what’s causing the issue is your secret weapon in the fight against these stubborn stains.
- First, consider the suspects: fabric softener, oil leaks, rust, or dye transfers. Knowing the culprit can help you zero in on the perfect remedy.
- If the case gets too complex, don’t hesitate to seek the counsel of laundry professionals or the manufacturer. They’ve got the knowledge and the expertise to solve even the most perplexing laundry mysteries.
- Next, you may need to try a few different cleaning procedures. The stain’s nature and your clothing material can point you towards the right treatment. For example, oil-stained clothing might need a pre-treatment, or some fabrics might require gentler laundry products.
- Regular maintenance is key to your washing machine’s performance. Make sure to check the drum and piping for rust, clean the drum, door seal, and drainage holes to prevent any build-up that could contribute to staining.
- Hidden beneath the agitator might be the source of your stain woes. Detach it carefully for a deep cleaning to ensure nothing’s lurking in your machine that could be staining your clothes.
- If rusted pipes are the culprits, consider calling a professional plumber to replace them. That way, you can eliminate the risk of future rust stains.
- Lastly, remember that knowing the problem is half the battle won. Though expert advice can guide you, you’ll also need to consider factors like the types of fabrics you wash and your laundry habits to find the best solution.
So here are your detective tools to banish dark stains:
- Tweak your detergent and fabric softener usage to avoid residue build-up.
- Empty pockets before every wash to avoid unwanted transfers onto your clothes.
- Try using gentler laundry products to reduce the risk of chemical stains.
- Explore specific cleaning procedures tailored for different clothing types.
- Clean your washing machine drum regularly to prevent staining.
- Tackle rust issues head-on, whether it’s using vinegar to dissolve rust or replacing rusted pipes.
With these tips and tricks up your sleeve, you’re well on your way to conquering dark stains on clothes after washing. Remember, with every load of laundry, you’re not just washing clothes – you’re keeping those sneaky stains in check.
Conclusion
As we round off our chat on those mysterious dark stains on clothes after washing, one thing’s clear – knowledge is power. Understanding what’s causing those pesky stains is half the battle won, and zeroing in on the specific culprit is key to fighting them off effectively.
These laundry villains come in many forms, making professional advice a real lifesaver for those tricky, head-scratching situations.
Scouting out all the possible options and whipping up a game plan can make a world of difference in keeping your clothes looking fresh and fabulous. So, follow that expert advice, tackle those stains head-on, and make your laundry day a win every time.
Five Facts About Dark Stains on Clothes After Washing:
- ✅ Fabric softener is the main culprit for dark stains on clothes after washing. (Source: Team Research)
- ✅ Rust stains can occur from iron oxide compounds inside the washing machine drum or pipes. (Source: Team Research)
- ✅ Oily streaks may be caused by using too much fabric softener or adding it at the wrong time in the washing cycle. (Source: Team Research)
- ✅ Different colored stains may be dye transfers from other clothes in the washer. (Source: Team Research)
- ✅ Cleaning the washing machine regularly and using the correct amount of detergent and softener can help prevent dark stains. (Source: Team Research)
FAQs about Dark Stains On Clothes After Washing
What causes dark stains on clothing after washing?
The main culprit for dark stains on clothing after washing is fabric softener. Using too much fabric softener or adding it at the wrong time can result in oily streaks on clothes. Other causes may include brown spots from oil leaks, rust stains, bleach stains, dye transfers, foreign objects in the washer, mold or mildew, and hard water content.
How can I prevent dark stains after washing?
To prevent dark stains after washing, make sure to clean your washer regularly to eliminate any possible causes. Use the correct amount of washing detergent and fabric softener as recommended. Clean any clothing stained with oil separately and check all pockets before starting the cycle. Follow proper cleaning procedures for different types of clothing and be mindful of the water temperature. Consider switching to lighter or gentler laundry products and check the drum and piping for rust.
How can I remove rust stains from inside a washing machine?
You can use vinegar or lemon juice to remove rust stains from inside a washing machine drum. Pour 2 cups of lemon juice or white distilled vinegar into the machine and run a wash cycle without clothes or detergent. Let it sit for an hour before running another full wash cycle. If rust stains persist, the issue may be in the pipes, especially with galvanized iron pipes, and they may need to be replaced.
What should I do to clean my washing machine?
If the problem isn’t rust, you can clean the washing machine drum to eliminate it as the cause of stains. You can use specific products designed to clean washing machine drums, or simply run an empty cycle with a cup of white vinegar or bleach. After the cycle, wipe the drum and door seal with a clean, dry towel, and clean out the drainage holes with a cotton swab or small absorbent tool.
How do I remove the agitator from my washing machine?
If you’ve tried various methods without success, try safely removing the agitator from your top-loading machine. Consult the manual or search online for the best way to do it safely. Once removed, clean the agitator of any dirt or grease build-up to ensure cleaner laundry.
What should I do if none of the methods work?
If you’ve exhausted all the methods and still find dark stains on clothes after washing, it’s time to consult the machine’s manufacturer or a laundry professional. They can help identify the issue and provide solutions to eradicate the problem. It is recommended to seek professional assistance for inspections or component removal, especially if the problem lies within the pipes or agitator.
Additional Reading
Here are some related topics you might find insightful:
- How to Disinfect Carpet Without a Steam Cleaner: This article provides effective methods for deep cleaning and disinfecting carpets without using a steam cleaner. Similar methods could be employed in certain laundry situations.
- Getting Rid of Mold on a Bathroom Ceiling: Mold can also cause dark stains. While the article talks about bathroom ceilings, you can apply some principles to other items, like clothes.
- How to Clean Carpet on Stairs: Understanding how to clean difficult areas can help develop better laundry practices. This article shares tips and tricks for cleaning carpeted stairs, another fabric that often stains.
- How to Clean Shower Tiles Without Scrubbing: Here, you’ll learn about the gentle ways of dealing with grime and stains, which could be applied to certain fabrics.
- How to Get Grass Stains Out of Jeans: This article specifically talks about stain removal from clothes, particularly those tough grass stains. Insights here could help understand more about managing dark stains after washing.