Choosing the Right Grill
First things first: if you’re just dipping your toes into the world of barbecuing, you’ll need to pick out a grill. Here, you have three main options: charcoal, gas, and pit BBQ grills. Each of them offers different advantages and trade-offs in terms of flavor, convenience, and cost. Let’s break it down:
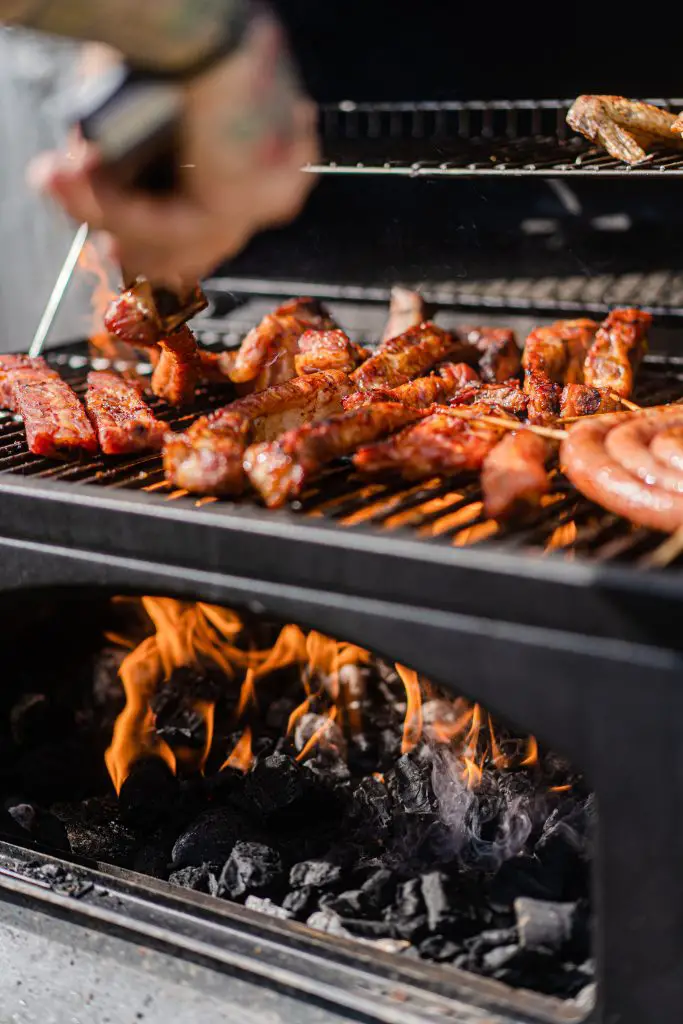
Charcoal Grills

Charcoal grills have long been a favorite among BBQ aficionados. What sets charcoal grills apart is their ability to deliver a potent, smoky flavor that’s synonymous with traditional barbecuing. There’s just something about the flavor and aroma of a charcoal grill that’s unmatched by any other type of grill.
However, that unique, mouth-watering taste doesn’t come without its trade-offs. Charcoal grills require a bit more effort to light and keep burning consistently. You’ll need to get your hands dirty with charcoal briquettes, which you’ll light and then need to maintain for the duration of your grilling session. The heat can be a bit trickier to control compared to gas grills, and the cleanup process requires you to deal with the ashes left behind.
Still, if you’re a purist who cherishes that classic, smoky BBQ taste, you’d argue that the added work is more than worth it. Want to know more about the fuel that makes this grill a flavor superstar? Discover what charcoal briquettes are made of in this fascinating read.
Gas Grills
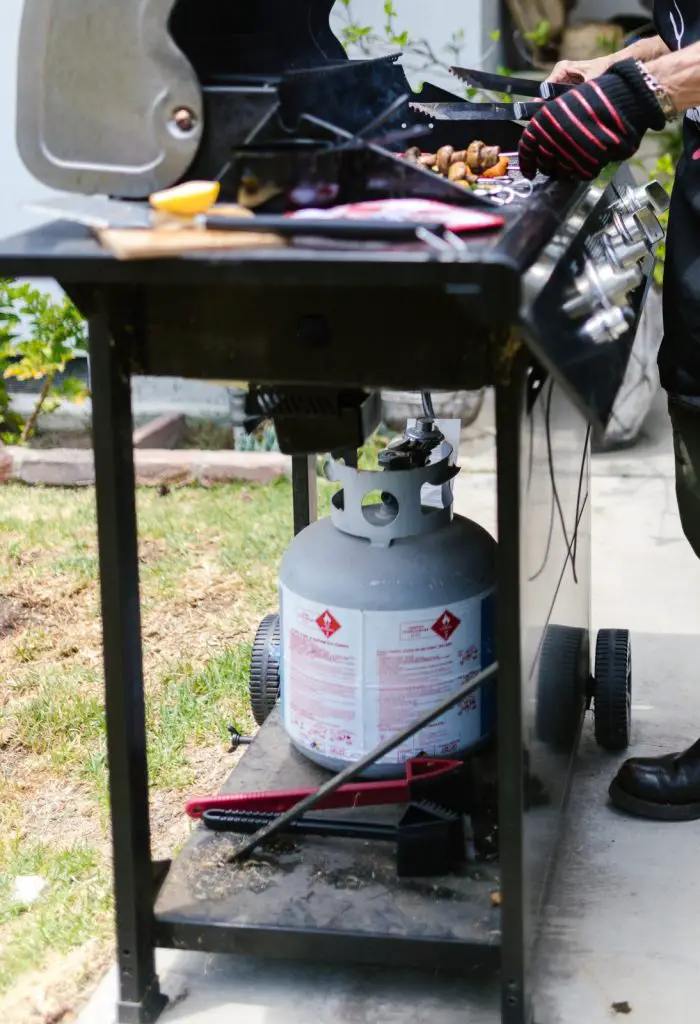
On the other end of the spectrum are gas grills, the champions of convenience in the grilling world. These grills are beloved for their ease of use. Starting a gas grill involves no more than turning a knob and pressing an ignition button, and within minutes, you’re ready to grill.
The temperature control of gas grills is also worth mentioning. With easy-to-adjust knobs, maintaining consistent heat across the cooking surface is a breeze. Plus, when it comes to cleaning up, gas grills make the process more straightforward, as there are no messy ashes to deal with.
But it’s important to note that while gas grills are undeniably handy, they might not deliver the same level of smoky flavor that you can achieve with charcoal. They do an excellent job for most grilling needs, but if you’re a hardcore BBQ lover, you might miss that characteristic smoky punch.
If you’re leaning towards gas grills for their convenience and ease of use, make sure to check out this guide on how to connect a natural gas line to your grill.
Pit BBQ Grills
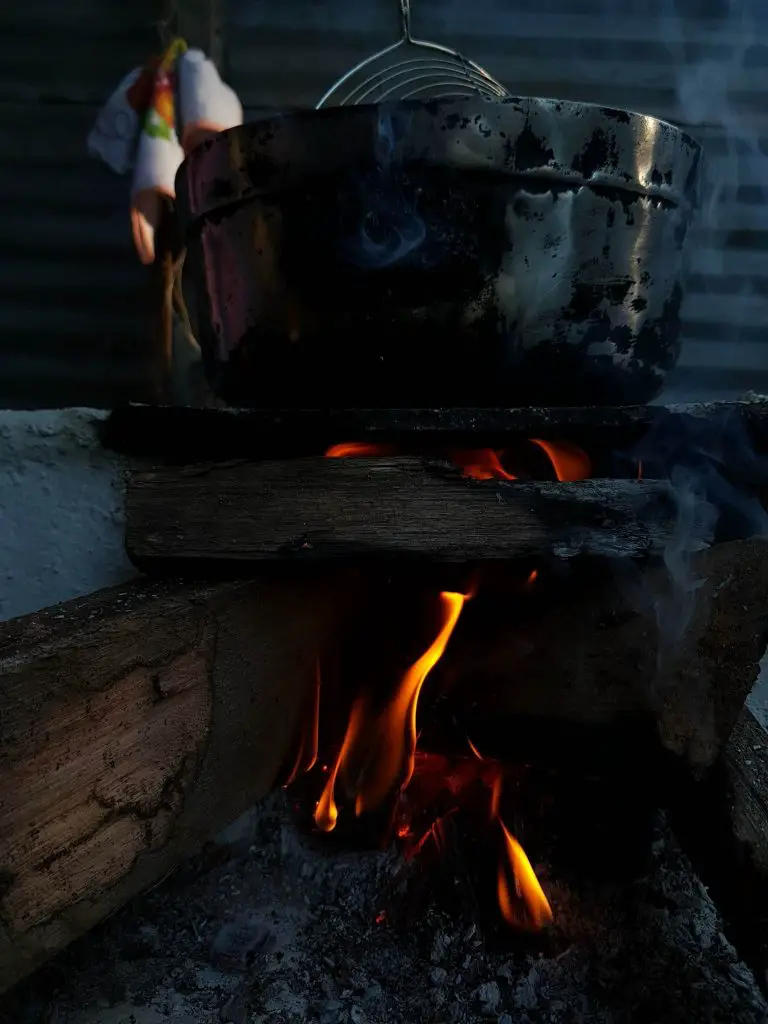
Last but not least, we have pit BBQ grills, an age-old method that’s as much about the experience as it is about the food. Think of pit BBQ grills as a bonfire with benefits: they consist of a fire pit with a grill grate placed over it.
This type of grill provides a rustic, outdoorsy cooking experience. It’s perfect for those slow-cooked meats that can soak in hours of smoky flavor. However, they demand a degree of patience and finesse: building the fire, maintaining consistent heat, and carefully managing the cooking process is an art in itself.
But for those who revel in the tradition and romance of cooking over an open fire, pit BBQ grills are the way to go. They may require more effort, but the results — and the experience — can be incredibly rewarding.
Preparing the Grill
Once you’ve chosen your grill, it’s time to prepare it for the epic cookout you’re planning. Just like a maestro tuning their instrument before a performance, you need to prep your grill to ensure it delivers a top-tier barbecuing experience. Let’s break down the steps:
Clean It Up
The first step in prepping your grill is to make sure it’s clean. Cleanliness is not only vital for your grill’s performance but also crucial for the flavor of your food. When you’ve got remnants from last month’s BBQ sticking to your grill, you’re not getting the true taste of what you’re cooking today.
Start by scrubbing the grates. This is where your food will sit, so you want to ensure it’s as clean as possible. If your grates are cast iron, make sure to reseason them after cleaning to prevent rusting.
Next, focus on the inside of the grill. Remove any ashes or charred bits left over from your previous cookouts. A clean grill allows for better airflow and more even heat distribution. Then, give the exterior of your grill a good wipe-down.
For detailed information on the best way to clean your grill, check out this comprehensive grill cleaning guide.
Light It Up
With your grill now shining clean, it’s time to bring on the heat. The process for lighting your grill will vary based on the type of grill you’re using.
For charcoal grills, you have a few options:
- Chimney Starter: This is my personal favorite because it’s efficient and doesn’t leave a chemical aftertaste. You stuff newspaper into the bottom of the chimney, fill the top with charcoal, then light the newspaper. In about 15-20 minutes, your coals should be ready.
- Lighter Fluid: While I’m not the biggest fan due to the potential chemical taste, lighter fluid is undoubtedly effective. You douse your charcoal in fluid, wait a moment for it to soak in, then light it. Just be careful not to use too much, or your food may end up tasting like lighter fluid.
- Electric Charcoal Starter: These are similar to large curling irons. You pile your charcoal around the starter, plug it in, and the heat from the coil lights the charcoal. It’s a great, reliable option, especially if you’re not comfortable handling fire.
- Fire Starters: Fire starters are a natural alternative to lighter fluid. They’re small cubes or sticks made from sawdust and wax. Simply place a couple of these beneath your charcoal stack and light them up. They’ll burn long enough to ignite your charcoal without leaving any chemical taste behind.
- Looflighter: A Looflighter combines the efficiency of an electric charcoal starter and a hot air starter. You simply touch the stacked charcoal with the Looflighter, and in about a minute, you’ll see sparks fly. After that, pull the Looflighter back a bit and continue for another minute or so. You’ll have your charcoal blazing without any need for lighter fluid or fire starters.
When using a charcoal grill, wait until the coals are covered with white-gray ash to ensure they’re ready for cooking.
For gas grills, life is a bit simpler. Most come equipped with an ignition button that you press once you’ve opened the gas valve. Presto—you’re ready to grill!
Properly prepping your grill will set the stage for a successful, flavorful BBQ. Now that your grill is clean and heated, you’re ready to dive into the wonderful world of grilling. Let’s get cooking!
Cooking Techniques
Grilling is more than just throwing some meat on the BBQ and flipping it once or twice. It’s an art that involves various techniques, each with its purpose, depending on what you’re cooking. The two primary methods used in grilling are direct and indirect heat. These are not just fancy terms thrown around by grill masters, but fundamental concepts that can dramatically affect your BBQ outcomes.
Direct Heat
Think of direct heat grilling as the “front lines” of your grill. In this method, you’re placing the food directly above the heat source, be it the charcoal briquettes in a charcoal grill or the gas burners in a gas grill.
Direct heat grilling is perfect for foods that cook quickly. These are typically thinner, smaller pieces like hamburgers, hot dogs, kebabs, and steaks. Vegetables and fruits also fall into this category.
The benefit of direct heat is that it sears the exterior of the food, creating a delicious crust that seals in juices and enhances the flavor. You know those appetizing grill marks and that satisfying crust on a grilled steak or burger? That’s the magic of direct heat at work.
However, this method requires a watchful eye. Due to the high heat, it’s easy for food to go from perfectly cooked to charred in a matter of minutes. So keep your tongs ready and your attention undivided.
Indirect Heat
Then we have indirect heat, the “strategic reserves” of your grill. Instead of being right over the flame, the food is off to the side, cooking in a less aggressive, more oven-like manner. The heat reflects off the lid and sides of the grill, cooking the food evenly and gently.
Indirect heat is your go-to method for larger, tougher, or bone-in pieces that need more time to cook thoroughly, like whole chickens, large roasts, ribs, or pork shoulders. It’s also ideal for foods that can easily burn on the outside while remaining raw on the inside if subjected to high heat.
The trick with indirect heat is to maintain a consistent temperature inside your grill. Much like baking, temperature consistency is key to ensuring your food cooks evenly and doesn’t dry out. This might mean occasionally adding more coals in a charcoal grill or adjusting the burners on a gas grill.
Direct and indirect heat methods can also be combined in a technique known as two-zone grilling. Start your food on the direct heat side to achieve a great sear, then move it to the indirect heat side to finish cooking. This way, you get the best of both worlds: a fantastic sear from direct heat and the gentle, even cooking of indirect heat.
Understanding these grilling methods and when to use them is a game-changer. It takes you from just grilling food to creating BBQ masterpieces. Up next, we’re going to discuss one of the most critical parts of barbecuing — food safety. After all, the tastiest BBQ in the world isn’t worth much if it’s not safe to eat. So let’s get into it.
Food Safety
One of the most critical aspects of grilling that often gets overlooked in the excitement of a BBQ is food safety. As fun, as a BBQ can be, it’s also an environment where foodborne pathogens can thrive if we’re not careful. We definitely don’t want your memorable BBQ to be memorable for the wrong reasons. So let’s go through some crucial food safety tips to keep everyone healthy and happy.
Handling and Storing Meat Properly
When handling raw meat, it’s essential to avoid cross-contamination. This can occur if raw meat, which may contain harmful bacteria, comes into contact with other food or surfaces.
The way you store your meat is equally important. Ensure that raw meat is properly packaged and kept on the lowest shelf of your fridge so that any juices don’t drip onto other foods. And remember: meat should be stored in the fridge or cooler until you’re ready to place it on the grill. Leaving meat out in the warm air for too long can encourage bacteria to multiply.
Here’s the golden rule: keep raw and cooked meats separate at all times. That means using different cutting boards, utensils, and plates for raw and cooked meats. And it doesn’t stop there. You also need to keep raw meat separate from other foods, like veggies and fruits, that may not be cooked or will be cooked at a different temperature.
Also, don’t forget to wash your hands thoroughly with soap and warm water after handling raw meat. This simple act can prevent the spread of harmful bacteria to other surfaces and foods.
Using a Meat Thermometer
Even if you’ve mastered the art of grilling, eyeballing whether a piece of meat is cooked just doesn’t cut it. The only surefire way to know if your meat is cooked to a safe temperature is by using a meat thermometer.
Different meats have different minimum internal temperatures at which they’re considered safe to eat. For example, poultry should be cooked to an internal temperature of 165°F (74°C), while steaks and roasts can be safe at a lower temperature, around 145°F (63°C) followed by a three-minute rest.
A meat thermometer takes the guesswork out of grilling. No more cutting into your beautifully grilled steak only to find it’s not done yet. Plus, it ensures that your food is not just perfectly cooked but also safe to eat, preventing potential foodborne illnesses.
In the end, practicing good food safety is as much a part of a great BBQ as choosing the right grill or mastering the cooking techniques. So be vigilant, be safe, and ensure your BBQ is memorable for all the right reasons.
Up next, we’re going to talk about some tips and tricks to elevate your grilling game even further. These nuggets of wisdom can help you go from a good griller to a true BBQ master, so let’s dive in!
| Meat Type | Recommended Internal Temperature |
|---|---|
| Poultry (chicken, turkey, duck) | 165°F (74°C) |
| Ground Meats (beef, pork) | 160°F (71°C) |
| Ground Poultry | 165°F (74°C) |
| Pork, Veal, and Lamb | 145°F (63°C), followed by a three-minute rest |
| Steaks, Roasts, Fish | 145°F (63°C), followed by a three-minute rest |
| Precooked Meats (hot dogs, sausages) | Reheat to 140°F (60°C) |
Tips and Tricks
Ready to level up your grilling game? Here are some of my favorite tips and tricks for barbecuing:
- Perfect Grill Marks: For those enviable sear marks, place your meat on the grill, let it sear undisturbed (no peeking!), then rotate it 90 degrees.
- Prevent Sticking: To keep your food from sticking to the grill, oil the grates right before you add your food.
- Add Flavor: To enhance your BBQ flavor, try adding wood chips to your grill. They come in a variety of flavors like hickory, mesquite, apple, and cherry.
Troubleshooting Common Grilling Issues
Grilling isn’t always smooth sailing. But don’t worry—most common grilling issues have straightforward solutions. Here are some common problems and their fixes:
- Flare-Ups: These are sudden bursts of flame caused by fat dripping onto the heat source. To prevent flare-ups, trim excess fat from meat before grilling. If a flare-up occurs, move the food to another part of the grill until the flame dies down.
- Food Sticking to the Grates: This is often caused by grates that aren’t clean or properly seasoned. Make sure to clean your grates before each use and season them periodically.
- Uneven Heating: If your grill isn’t heating evenly, there may be an issue with the gas flow (for gas grills) or the distribution of charcoal (for charcoal grills). For gas grills, make sure the burners are clean and the gas lines aren’t blocked. For charcoal grills, ensure the charcoal is evenly spread.
Cleaning and Maintenance
Just like any cooking equipment, proper cleaning and maintenance are key to prolonging the life of your grill.
- Removing Ashes: If you’re using a charcoal grill, make sure to remove ashes after each use once they’ve cooled down.
- Cleaning the Grates: Clean the grates after each use. Remember to re-season them if necessary.
- Storing the Grill: Protect your grill from the elements by covering it or storing it in a dry place.
Frequently Asked Questions
How do you start a charcoal grill starter?
A charcoal grill starter, or chimney starter, simplifies the process of lighting charcoal. Simply fill the chimney with charcoal briquettes, place crumpled newspaper or a lighter cube underneath, and light. After about 15-20 minutes, your coals should be glowing hot and ready for grilling.
How do you get coals to light?
To light coals, arrange them in a pyramid shape in your grill, apply lighter fluid evenly, and ignite. Let the coals burn until they’re covered in white-gray ash—that’s when they’re ready for cooking.
How do you start a BBQ for dummies?
Start by cleaning your grill. If using a charcoal grill, use a chimney starter to light the charcoal. For a gas grill, open the gas valve and press the ignition button. Once the grill is hot, arrange your food on the grates and start cooking!
How do you burn charcoal on a BBQ?
Place your charcoal in the grill, forming a pyramid shape. Light the charcoal and let it burn until the coals are covered with white-gray ash. Spread the coals out evenly before placing your food on the grates.
Can I use a gas grill without a natural gas line or propane tank?
No, gas grills need a source of gas to function. They’re typically designed to use either propane tanks or a natural gas line.
Can I put my charcoal grill in the dishwasher?
No, charcoal grills should not be put in the dishwasher. The heat and water can damage the grill. Instead, use a grill brush and mild dish soap to clean.
Is it safe to grill indoors?
Grilling indoors is not recommended due to the risk of carbon monoxide poisoning, fire hazards, and the amount of smoke that’s produced. Grilling should always be done in a well-ventilated outdoor area.
What’s the best way to extinguish coals after grilling?
To safely extinguish coals, close your grill’s lid and vents. This cuts off the oxygen supply to the coals, causing them to cool down. Once cooled, dispose of the ashes properly.
CONCLUSION
Starting a BBQ grill might seem like a daunting task at first, but trust me, it’s a skill well worth learning. With the tips and tricks in this guide, you’re well on your way to becoming a BBQ pro. And remember, the key ingredient in any BBQ isn’t just the meat—it’s the love and enjoyment you put into cooking. Happy grilling!
Additional Reading
Ready to upgrade your backyard experience further? Check out these insightful guides:
- Heavy Duty Lawn Chairs: Add comfort and style to your outdoor space with heavy-duty lawn chairs. They’re built to last and can handle more weight than your average chair. Find your perfect match in this comprehensive guide.
- Battery-Powered Self-Propelled Lawnmower: If you have a large lawn, a battery-powered self-propelled lawnmower can be a game-changer. No more struggling with cords or hefty gas mowers. Discover the best models here.
- How to Get Rid of Pigeons on Balcony: Pigeons can be a nuisance when they invade your balcony, making a mess and causing damage. Learn how to safely and humanely deter them with this helpful guide.
- Lawn Sinks When Walking On It: If your lawn sinks under your weight, there could be a few underlying issues, from poor soil composition to burrowing critters. Find out how to diagnose and resolve the issue with this detailed article.