Key Takeaway:
- Clean and prepare the garage floor: Before sealing the garage floor, make sure to thoroughly clean the surface, treat oil stains, and fill cracks with a polyurethane crack filler for optimal results.
- Choose the right sealer for your needs: There are different types of floor sealers, such as film-forming sealers and silane/siloxane sealers, each with its own pros and cons. Consider the location and personal preferences when selecting a sealer.
- Our recommended choice: Silane/siloxane floor sealer: The MasonrySaver All-Purpose Heavy Duty Water Repellent is an excellent option for those who want to penetrate the concrete and repel water while preserving the surface’s natural appearance. Proper surface preparation is critical to adhesion and longevity.
Introduction
Garage floors require sealing to increase their longevity and protect them from damage. Here’s how you can seal your garage floor like a professional.
- You need to prepare the surface by removing all grease, dirt, and oil stains.
- Choose between two types of sealer – epoxy or penetrating sealers.
- Apply the sealer following the manufacturer’s instructions and leave it to dry for 24 hours.
- After that, apply a second coat to ensure maximum protection.
For best results, maintain your garage floor regularly by cleaning it with warm water and mild detergent.
Pro Tip: Use a roller or a sprayer to apply the sealer to ensure even coverage.
Basic steps for sealing a garage floor
Sealing your garage floor can protect it from damage and improve its appearance. I learned that there are basic steps you can take to ensure that the job is done well. Firstly, cleaning the garage floor with a concrete cleaner and power washer can help remove any dirt, debris, or oil stains. It is important to treat any oil stains before applying the cleaner. Secondly, applying the sealer with a paint pad can help avoid puddling that can lead to unevenness on the floor. Lastly, filling any cracks with a polyurethane crack filler can provide extra protection from future damage. These simple steps can make all the difference.
Clean the floor with a concrete cleaner and power washer
To prepare the garage floor for sealing, it is essential to thoroughly clean the concrete surface with a concrete cleaner and power washer to ensure an adequate surface for adhesion. Here are four simple steps to ‘clean the floor with a concrete cleaner and power washer’ properly:
- Remove all items from the garage floor before starting cleaning.
- Apply a concrete cleaner to the surface and let it sit for about 15 minutes.
- Use a high-pressure power washer to remove any dirt or debris.
- Repeat until the entire surface is free of dirt, grime, oil stains, and other contaminants.
It is crucial to remember that when using a power washer, one must be careful not to damage or etch concrete surfaces by maintaining safe pressure levels. Ensure that the floor has adequately dried out before any further treatment is done by covering it with plastic sheeting if necessary. The use of appropriate sealants can help safeguard your garage’s concrete flooring from everyday wear and tear like scratches or abrasions. In addition, sealing your garage floor protects it from harsh chemicals prevalent in garages such as gasoline spills or road salts.
Story – I recall this time when my friend was preparing his garage for selling his car collection. He wanted his garage flooring spotless so he could showcase his cars better, so he called in experts who efficiently cleaned it with specialized equipment only to find stains still remained on the flooring once it dried up! So he did what any sensible man would do – He cleaned it again but this time used a good quality cleaner mixed with water which solved the problem – now his collection shone like diamonds on velvet! Oil stains may be a sign of a well-used garage, but don’t let them ruin your seal – treat them before power washing.
Treat oil stains before power washing
Before power washing, it is essential to treat oil stains on a garage floor. Neglecting oil stains can result in patchy sealer coverage, leading to premature deterioration and costly repairs. To treat oil stains before power washing, follow these six steps:
- Remove any visible grit or debris from the affected area
- Spread sawdust or cat litter over the stain and allow it to absorb for several hours
- Sweep up the sawdust or cat litter with a broom or brush
- Apply a degreasing cleaning solution to the stain
- Agitate the solution with a stiff-bristled brush
- Rinse the area thoroughly with water and allow it to dry completely before power washing.
It is crucial to note that treating oil stains before power washing is a necessary step that should not be skipped. Skipping this step can lead to an uneven application of sealant that will not bond correctly and will ultimately fail.
Incorporating this simple yet crucial approach of treating oil stains before power washing can help maintain your garage floor’s structural integrity for years, contributing significantly towards prolonging durability and avoiding repair costs in return.
Sealing a garage floor is like painting a masterpiece: you want to avoid puddles at all costs.
While you’re revamping your garage floor, why not give your motorcycle a fresh look too? Check out our guide on how to clean a motorcycle exhaust for a complete garage makeover.
Apply sealer with a paint pad to avoid puddling
To prevent the sealer from pooling on the garage floor, it is best to apply the sealer with a paint pad. Using this method ensures that the sealer is evenly distributed across the surface of the concrete, preventing unsightly puddles from forming.
Here is a 5-step guide on how to apply the sealer with a paint pad and avoid puddling:
- Clean the floor properly to ensure maximum adhesion of the sealer.
- Pour some sealer into a paint tray and dip your paint pad into it.
- Starting in one corner, apply the sealer in even strokes, moving uniformly across the entire surface.
- Overlapping your previous strokes by 50%, continue applying the sealer until you reach the end of the area being sealed.
- Allow the surface to dry completely before walking or driving on it.
It’s worth mentioning that using a paint pad for application can be time-consuming, but it guarantees an even spread. Notably, if an unevenly applied coating dries on your garage floor, sanding will be required before any additional coats can be applied.
In truth, sealing garage floors is like investing in insurance. Indeed, cracking and spalling caused by freeze-thaw cycles are hazardous and costly to fix. Applying high-quality sealers like silane/siloxane waterproofs garages against unwanted moisture penetration keeping them attractive and durable for years to come.
Fix those cracks before they become Grand Canyon replicas with polyurethane crack filler.
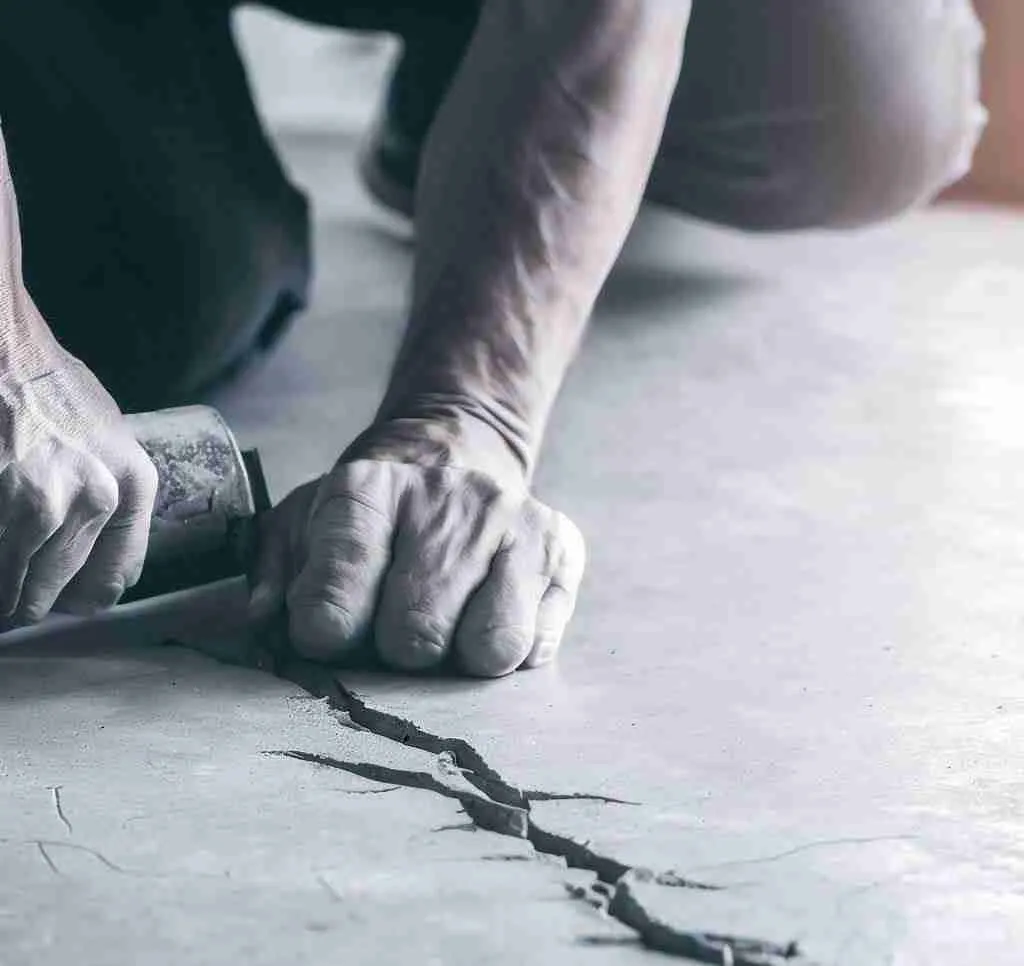
Fill cracks with a polyurethane crack filler
To successfully seal a garage floor, ensuring that cracks are filled with a suitable substance is crucial. Polyurethane crack filler is one such material that is effective at repairing cracks before applying a sealer.
Here are five steps to follow when using polyurethane crack filler:
- Before starting, clean the cracks with a wire brush or broom to remove loose debris and dust.
- Cut the nozzle of the filler tube at a 45-degree angle and pierce its seal with a screwdriver or other sharp tool.
- Squeeze the filler making sure to apply it directly into the cracks. Overfilling may occur, so keep an eye on this and wipe away any excess with a damp cloth.
- Allow the filler to dry, which usually takes about 24 hours but can vary according to temperature and humidity levels. It’s best not to put any weight on the repaired areas during this time.
- Smooth out any bumps or remaining roughness by sanding down the surface until it’s even. The repaired area will now be ready for sealing.
It’s worth noting that filling cracks with polyurethane is an essential step in surface preparation. Neglecting this step will result in inferior sealing application quality and cause issues for your flooring.
It’s also important to use appropriate safety precautions when handling polyurethane fillers. Gloves, protective goggles, and masks should be worn when working with these chemicals.
Choosing the right floor sealer is like choosing a spouse – it’s all about compatibility and long-lasting effects.
Types of floor sealers
When it comes to sealing a garage floor, there are several types of floor sealers to consider. Each comes with its own set of pros and cons, depending on your particular needs and preferences.
One option is film-forming sealers, including acrylic, epoxy, and polyurethane. These sealers sit on top of your garage floor, providing a durable layer of protection.
Another choice is silane/siloxane sealers, which penetrate the concrete and repel water from within.
Deciding on the right sealer for your location and personal preferences is important for achieving optimal results.
Film-forming sealers: acrylic, epoxy, and polyurethane
Coating or sealing a garage floor using film-forming sealers that include acrylic, epoxy, and polyurethane is an effective way to protect it against undesirable substances. Here are some details about each sealer:
| Sealer | Type | Pros | Cons |
|---|---|---|---|
| Acrylic Sealers | Water-based coatings | Easy to apply, dries quickly, affordable | Wear out faster than other sealers |
| Epoxy Sealers | Two-part systems of resin and hardener | High-strength coating that resists stains, chipping, and abrasion; long-lasting finish; can be used on both interior and exterior concrete surfaces. | Can yellow if exposed to direct sunlight |
| Polyurethane Sealers | Highly flexible synthetic resins | Resistant to high levels of abrasions, chemicals, UV lights; provide a brilliant glossy finish when required; | “Hot-tire pickup” can occur if exposed to hot car tires |
It is important to note that before applying any of these sealing products make sure the surface has been cleaned thoroughly of oil stains through power washing. Ensure there are no cracks on the surface by filing any cracks that may exist with a suitable polyurethane filler.
When it comes to sealing the garage floor with a film-forming sealer such as acrylics, epoxies, or polyurethanes, it is necessary to choose the right one per its location and personal preferences. However, we recommend using Silane/Siloxane sealers as they easily penetrate concrete surfaces repelling water from within instead of forming a protective coating on top of the surface:
To achieve maximum adhesion between the sealing product’s ingredients and the garage floor’s texture for long-lasting results, clean up all visible debris from cracks then complete power washing once dry before proceeding with sealing.
Sealing garage floors require adequate precautions to attain desirable outcomes. Get started now by selecting one of the best sealing products based on individual preferences and location to protect your garage floor.
Film-forming sealers may make your garage floor look like a million bucks, but they could also leave you bankrupt.
Pros and cons of film-forming sealers
Film-forming sealers: Advantages and Disadvantages
When it comes to sealing garage floors, one of the widely used types of sealers available in the market are called film-forming sealers. These types of sealers come in three forms: acrylic, epoxy, and polyurethane. Each of these forms has its advantages and disadvantages which are mentioned below.
- Pros:
- – Creates a protective surface against stains, dust, dirt, and debris.
- – Enhances the appearance of the floor by giving it a glossy finish.
- – Resistant against UV radiation that might cause fading.
- Cons:
- – Might create a slippery surface when exposed to moisture or water spills.
- – Needs proper maintenance as dirt can stick more as opposed to an untreated surface.
It is essential to choose a sealer based on your location and personal preferences. Although film-forming sealers can protect against mild chemicals, oils, and grease stains by forming a barrier over the concrete floor; they may also require serious upkeep to avoid possible hazards such as streaks or potential falls.
Before using any sealer on a garage floor, appropriate measures should be taken for maximum adhesion. Using products like concrete cleaner and power washer should remove all organic substance residues left behind on the concrete surface will give it an etched look for better bonding between the sealer and surfaces.
To avoid hazards while keeping costs minimal and results effective choosing silane/siloxane floor sealing options would be an incredible alternative to choosing film-forming sealants. MasonrySaver All-Purpose Heavy Duty Water Repellent is one option readily available in any home improvement store that can penetrate deeper into concrete surfaces and repel water without changing color or leaving behind any sheen.
Concrete may hold up the garage, but silane/siloxane sealers hold back the water.
Silane/siloxane sealers: penetrate concrete and repel water
Silane/siloxane sealers are an effective solution for protecting garage floors from water damage. These sealers penetrate deep into the concrete and create a barrier that repels water and other liquids. Unlike film-forming sealers, which can crack or peel over time, silane/siloxane sealers won’t change the appearance or texture of the concrete. They work by filling in the pores of the concrete surface and creating a hydrophobic layer that prevents water and other liquids from penetrating into the substrate.
Moreover, these types of sealers are particularly useful for outdoor applications because they can provide long-lasting protection against rain, snow, and ice. The silane/siloxane technology used in these sealers is also environmentally friendly since they don’t contain any harmful chemicals that could leach into soil or groundwater.
When it comes to choosing a sealer based on location and personal preferences, silane/siloxane floor sealer is an excellent choice for those who want to protect their garage floor from water damage while maintaining its natural appearance. By using this type of sealer, you can effectively prevent costly repair bills down the line.
It’s essential to remember that proper surface preparation is critical before applying any type of sealer to your garage floor. You must clean the floor thoroughly with a concrete cleaner and power washer before applying any kind of sealer. Any oil stains should be treated beforehand as well, as they can prevent sealer adhesion.
Overall, using a silane/siloxane sealer like MasonrySaver All-Purpose Heavy Duty Water Repellent will help you keep your garage floor looking great while providing excellent protection against water damage. Whether you’re preparing your home for sale or just looking to maintain its value over time, sealing your garage floor with this type of product is an excellent investment in your property’s future.
Choosing the right sealer for your garage floor is like choosing the right partner – it’s all about location and personal preferences.
Choosing a sealer based on location and personal preferences
Choosing a sealer that fits the location and personal preferences is vital. Here are some factors to consider before purchasing sealer:
| Factor | Consideration |
|---|---|
| Location | Interior or Exterior |
| Climate | Dry or Wet Climate |
| Purpose of Garage | Storage or Work Area |
| Budget | High, Moderate, Low |
It is crucial to select a sealer for the floor based on factors such as location, climate, garage purpose, and budget. Each of these aspects plays a significant role in determining the most suitable sealer for the concrete surface. Furthermore, choosing an appropriate type of film-forming sealers like acrylic, epoxy, and polyurethane should be done based on personal preferences.
Before sealing your garage floor with any product, it’s advisable to invest time and energy in preparing the surface adequately. Surface preparation involves cleaning the garage concretely using a high-quality concrete cleaner thoroughly. This step also includes power washing with clean water and letting it dry thoroughly before applying sealer.
To ensure longevity and durability in sealing concrete floors, it’s a great idea to choose silane/siloxane floor sealer options rather than film-forming sealers. Silane/siloxane sealers have excellent penetration properties that effectively repel water from concrete surfaces without forming dense layers on top.
For best results when selecting sealers for your garage floor, it’s always useful to consult with professional contractors who specialize in this area. They can offer advice on choosing the right type of sealant based on your unique needs and budget constraints while ensuring you get long-lasting results that meet all your requirements.
Put your trust in silane/siloxane and never fear a garage floor stain again.
Our choice: silane/siloxane floor sealer
When it comes to sealing a garage floor, you have a lot of options to choose from. But after doing some research, my team and I have deemed the silane/siloxane floor sealer as the best choice. After all, it offers several advantages that other types of floor sealers may not provide. In this section, we will take a closer look at two sub-sections that speak to these advantages.
- MasonrySaver All-Purpose Heavy-Duty Water Repellent: This is an excellent choice for your garage floor sealer.
- Advantages of using a silane/siloxane sealer: It provides long-lasting durability.
MasonrySaver All-Purpose Heavy Duty Water Repellent
A heavy-duty water repellent that can be used on various surfaces is MasonrySaver All-Purpose. This high-quality sealer penetrates deeply into the concrete and repels water, helping to avoid damage and deterioration caused by moisture. It offers a great solution in areas with frequent precipitation or high humidity levels.
One of the advantages of using MasonrySaver All-Purpose Heavy Duty Water Repellent is that it dries relatively fast after application and will not leave any residue on the surface. Due to its penetrating nature, this sealer also creates a long-lasting barrier against water that is difficult to wear out over time.
Over time, garages can be exposed to numerous contaminants like oil spills, brake fluid drips, or even mold growth due to moisture accumulation. But using MasonrySaver All-Purpose Heavy Duty Water Repellent assists in safeguarding against these damages at a quick pace and is highly recommended.
As per reports from users who have already applied MasonrySaver All-Purpose Heavy Duty Water Repellent on their garage floors mentioned how it made cleaning much easier and helped protect against future damage, ultimately leaving them with a cleaner-looking garage floor surface for longer durations.
Seal your garage floor with silane/siloxane and never worry about water damage again.
After sealing your garage floor, it’s important to ensure you have easy access to your improved space. Discover how to open a locked garage door from the outside without a key in our step-by-step guide.
Advantages of using silane/siloxane sealer
Using silane/siloxane sealers for garage floors has several advantages:
- They penetrate the concrete surface and repel water, preventing damage caused by moisture.
- Silane/siloxane sealers are breathable, allowing moisture to escape from the concrete while preventing water from getting in.
- These sealers provide excellent protection against freeze-thaw damage as they stop water from penetrating into the substrate and expanding during freeze cycles.
- They don’t change the appearance of the surface or leave a glossy finish like film-forming sealers, making them ideal for those who prefer a natural look.
- Silane/siloxane sealers generally have longer lifetimes compared to other types of floor sealers as they don’t peel or delaminate over time.
- Since silane/siloxane sealers are non-toxic, it makes them safe to use indoors without any respiratory hazards.
It’s crucial to note that proper surface preparation is necessary before sealing with silane/siloxane sealer. Cleaning and drying the surface thoroughly ensure proper adhesion.
Pro Tip: Apply two coats of silane/siloxane sealer using a cross-hatch pattern for better coverage.
Before sealing your garage floor, remember: you can’t just sweep your problems under the rug, you gotta power wash them away.
Surface preparation before sealing
As a DIY enthusiast, I know firsthand that the success of any project lies in the preparation phase. The same holds for sealing a garage floor. In this part, we’ll discuss the crucial role surface preparation plays in achieving long-lasting adhesion. Without proper preparation, sealers may not adhere, causing the coating to peel or flake prematurely. It’s essential to take appropriate steps to remove oil stains, paints, and old adhesives to ensure a clean surface. Up next, I’ll be outlining the steps required for surface preparation, which includes cleaning, power washing, and drying.
Maintaining proper humidity levels in your garage is key to preserving your freshly sealed floor. Learn about the best dehumidifiers to keep your garage in optimal condition.
Importance of surface preparation for adhesion
Proper surface preparation is crucial for adhesive success when sealing a garage floor. Any contaminants or impurities on the surface may hamper the adhesion of the sealer. This makes it necessary to thoroughly clean and dry the concrete surface before application.
Additionally, power washing, scrubbing with a concrete cleaner, and treating oil stains should be done before applying sealant. Ignoring these steps can lead to uneven coverage, poor adherence, and a shortened lifespan of the applied sealant.
Furthermore, in some cases where the concrete has previously been sealed, it may be necessary to remove previous coatings using mechanical abrasion or chemical stripping agents.
For those looking to seal their garage floors without professional assistance, carefully following all preparatory steps helps ensure maximum adhesion between surface and sealer for long-lasting protection against moisture and wearing from heavy vehicular traffic. Don’t miss out on this essential precautionary step toward protecting your investment.
Before sealing, make sure your floor is cleaner than your conscience after a Tinder hookup.
Steps for surface preparation: cleaning, power washing, and drying
To ensure that surface preparation is done correctly, it’s essential to have a deep understanding of the various steps involved in the process. This will guarantee the adhesion of the sealer and the durability of the garage floor.
- Cleaning
The first step in surface preparation involves thoroughly clearing off any debris or dirt on the garage floor. A vacuum cleaner can help in getting rid of larger debris like rocks, while a stiff brush would be ideal for clearing away dirt buildup. - Power Washing
The next step is power washing; this helps to remove any remaining dirt that might not have been reached during cleaning. Hot water should be used when power washing as it helps to ensure maximum results. - Drying
Finally, after power washing, allow enough time for the surface to dry entirely. As suggested by experts, at least 24 hours without any moisture is recommended before beginning to seal the garage floor.
It’s worth noting that surface preparation holds great significance in achieving an excellent final result of sealing your concrete floor with a film-forming or silane/siloxane sealer. Skipping these essential steps could make adhesion difficult and lead to early sealer failure.
Conclusion: Benefits of sealing a garage floor
A properly sealed garage floor offers several advantages that can make your life more convenient and cost-effective. Sealing the garage floor not only enhances its visual appeal but also helps prevent moisture, dust, and debris from penetrating the surface. Moreover, sealed garage floors are easier to maintain and are resistant to abrasions and stains. Therefore, opting for sealing your garage floor can provide several benefits that can protect your investment and help you save time and money in the long run.
Sealing your garage floor with the right material can help you avoid expensive repairs and replacements. It can make your garage floor more durable and prevent it from cracking or chipping due to moisture or wear and tear. Additionally, a sealed garage floor can resist oil spills from cars, which can become extremely slippery and hazardous. Furthermore, a sealed garage floor can provide a more level and smooth surface, making it easier to park, clean, and store items, especially if you use your garage as a workshop or hobby area.
In addition to the aforementioned advantages, sealing your garage floor can also increase your property’s resale value. It can make your garage look more attractive and well-maintained, which can be a significant selling point if you decide to put your property on the market. Moreover, sealing your garage floor can also reduce energy costs by reflecting the sun’s rays and keeping the garage cooler during the summer months.
To get the most benefits from sealing your garage floor, you can follow some suggestions. First, prepare the surface by cleaning it thoroughly and repairing any cracks or holes. Then, select the proper sealant that is suitable for your garage floor’s material, climate, and usage. Finally, apply the sealant according to the manufacturer’s instructions and allow it to cure properly before using your garage. These steps can help you protect your garage floor and enjoy its benefits for a more extended period.
Five Facts About How To Seal a Garage Floor:
- ✅ There are four types of floor sealers for garage floors: film-forming acrylic, epoxy, and polyurethane, and silane/siloxane formulas.(Source: Team Research)
- ✅ Film-forming sealers provide a glossy, easy-to-clean finish, but require more rigorous surface preparation and can be slippery when wet.(Source: Team Research)
- ✅ Silane/siloxane formulas penetrate the concrete to form a hydrophobic surface that repels water and de-icing chemicals without changing the appearance of the floor.(Source: Team Research)
- ✅ It’s important to properly clean and prepare the garage floor before applying any sealer.(Source: Team Research)
- ✅ MasonrySaver All-Purpose Heavy Duty Water Repellent is a water-based silane/siloxane product recommended for protecting garage floors from freezing water and road salt.(Source: Team Research)
FAQs about How To Seal A Garage Floor
How do I keep my garage floor in good shape?
Maintaining your garage floor is key to keeping it in good shape. This can be achieved by cleaning it regularly and treating any oil stains before power washing. You can also protect your garage floor by using a concrete floor sealer.
Who is Dave Barnes?
Dave Barnes is the president of Saver Systems Inc., which is a manufacturer of concrete sealing and waterproofing products.
What are the different types of floor sealers?
There are four types of floor sealers: film-forming acrylic, epoxy, and polyurethane, silane/siloxane formulas, solvent-based sealers, and water-based sealers.
What is a good concrete floor sealer?
A good concrete floor sealer is one that is appropriate for your location and needs. The MasonrySaver All-Purpose Heavy Duty Water Repellent, a water-based silane/siloxane, is a good option for preventing damage from freezing water and road salt.
How do I apply garage floor sealer?
Start by cleaning the floor with a concrete cleaner and power washer. Apply the sealer with a paint pad and avoid puddles. After it dries, fill floor cracks with a polyurethane crack filler.
What are the benefits of floor sealing?
Sealing your garage floor can help prevent damage from moisture, freezing water, and road salt. It also makes it easier to clean and can give it a polished look.