Well, we’ve got the answers you’ve been looking for, all distilled into a simple, comprehensive guide. We’ll walk you through the basics of cleaning, deep cleaning, seasoning, and maintaining your cast iron pan. And for those of you dealing with a slightly worse-for-wear pan, we’ll cover troubleshooting too.
Step 1: Basic Cleaning
Your brunch was delicious, and your kitchen still carries a fragrant hint of bacon and scrambled eggs. But now, staring down at your pan, you find stubborn bits of charred food clinging to its surface. It’s time for basic cleaning.
First, let the pan cool down to avoid thermal shock, which could damage the iron. Then, grab a paper towel and wipe the pan to remove any excess food and oil. It might surprise you to see how much comes off with just this simple step.
Now, hold your pan under hot running water, scrubbing away gently with a non-abrasive sponge. If necessary, use regular dish soap to help cut through the grease.
The important part is drying the pan thoroughly afterward. Any residual moisture can lead to rust. Use a clean towel, or better yet, heat it on the stove to evaporate every last drop of water.
Step 2: Deep Cleaning
Sometimes, your cast iron pan needs a bit more TLC. This might be the case if it’s been a while since its last cleaning, or if rust spots have started to appear. Fear not, this is where deep cleaning steps in.
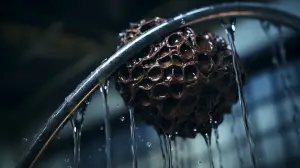
To start, arm yourself with some steel wool and a mixture of equal parts distilled white vinegar and water. This concoction, together with some elbow grease, will effectively remove stubborn grime and rust spots. Scrub away until you see that all the rust and grime have been banished.
Next, rinse your pan thoroughly and dry it completely as we covered in basic cleaning. The vinegar-water solution can be harsh, so it’s important to rinse all of it away before the drying step.
Step 3: Seasoning

In the grand arena of cookware, the term ‘seasoning’ takes on a whole different meaning, especially when it comes to cast iron pans. Put aside thoughts of oregano, cayenne, or any other fragrant spices. Here, ‘seasoning’ is all about preserving and enhancing your pan’s performance and longevity. It’s about creating a hardy non-stick surface that resists rust and stands up to time and use.
Seasoning a cast iron pan involves the deliberate application of oil and heat. And not just a slapdash application, mind you. You’ll want to coat the pan lightly but thoroughly, and that means every square inch of it, inside and out. We’re talking about the cooking surface, the sides, the exterior, and even the handle.
When it comes to choosing the right oil, you’ll want something with a high smoke point. Flaxseed oil and canola oil are excellent choices.
The application process is a lot like painting. Start by pouring a small amount of oil into the pan. Using a paper towel, spread it around, creating a thin, even layer. You’re aiming for a light sheen, not a thick, gloopy coat.
Once your pan is fully oiled, it’s time for the heat. Preheat your oven to a temperature of about 450°F, or around 230°C if you’re more into the metric system. Place your pan upside down in the oven, with a sheet of aluminum foil or a baking sheet on the rack below to catch any drips.
This step is where the magic happens. The high heat causes the oil to undergo a process known as polymerization, effectively transforming it into a hardened, shiny layer. Think of it as a built-in, natural non-stick coating that grows stronger with each round of seasoning.
After about an hour, carefully remove the pan (mind the heat!) and let it cool. Your cast iron pan should now sport a gleaming, non-stick surface that’s ready for all your culinary adventures.
Seasoning your cast iron pan isn’t just a one-time process. It’s something you’ll want to do regularly, each time building up that protective layer even more. Remember, a well-seasoned pan not only enhances your cooking but also stands as a testament to your dedication as a culinary caretaker.
Step 4: Maintenance
To keep your pan in good shape, you need to remember a few key maintenance tips. One major point is to avoid using soap or citrus-based cleaners, as they can strip away the seasoning you worked so hard to create. Instead, hot water and a non-abrasive sponge should be your go-to cleaning tools.
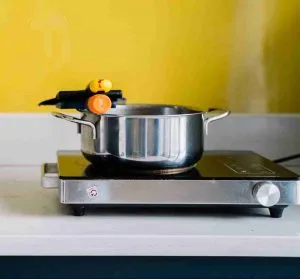
Also, make sure you store your pan in a dry place. Humidity is the arch-nemesis of cast iron, as it can lead to rust. If you’re using your pan on an induction stove, make sure to read up on how cast iron works on induction.
Lastly, remember that not all pans are oven-friendly. If you’re unsure, check out this guide on what pans can go in the oven.
Step 5: Troubleshooting
Like every good story, the life of a cast iron pan has its challenges. But, if your pan starts showing signs of rust or the seasoning begins to wear off, don’t despair. It’s not a tragic end, but rather an opportunity for redemption—a chance to re-season your pan.
Begin this process by giving your pan a thorough clean. Then, apply a thin layer of oil and heat it in the oven, just as we covered in the seasoning section. When done correctly, this process can bring even the most weary-looking pans back to life.
Comparing Cast Iron with Other Types of Cookware
While cast iron pans are beloved by many, it’s important to understand how they stack up against other types of cookware.
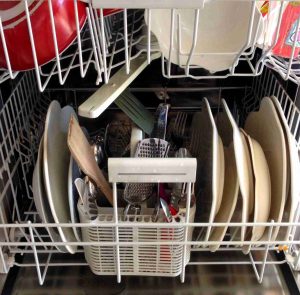
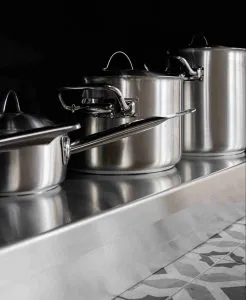
Cast Iron vs. Stainless Steel While cast iron retains heat well and can go from stovetop to oven with ease, it requires more care than stainless steel. Stainless steel pans are dishwasher-safe and don’t require seasoning, but they don’t retain heat as well.
Cast Iron vs. Non-Stick Non-stick pans are easy to clean and great for low-fat cooking, but they can’t withstand high heat like cast iron, and their coating will eventually wear off. Cast iron pans, if well-seasoned, are naturally non-stick and last a lifetime.
Cast Iron vs. Copper Copper pans heat up quickly and evenly, but they’re generally more expensive and require a lining of stainless steel or tin. Cast iron is more affordable and durable, but heavier and takes longer to heat up.
Caring for Your Cast Iron Pan: Do’s and Don’ts
Proper care of your cast iron pan is both an art and a science, and knowing what to do (and what not to do) can make all the difference.
| Do’s | Don’ts |
|---|---|
| Season your pan regularly: This creates a natural, non-stick surface and protects against rust. | Don’t soak your pan: Long periods in water can lead to rust. |
| Clean your pan after every use: This prevents the buildup of food particles and bacteria. Remember to let it cool first to avoid thermal shock. | Don’t store food in your pan: Acidic foods in particular can react with the iron and break down the seasoning. |
| Dry your pan thoroughly: Any residual moisture can lead to rusting. Towel dry or heat it on the stove to ensure it’s completely dry. | Don’t forget to oil your pan after cleaning: This helps maintain the seasoning and protect against rust. |
| Heat your pan gradually: Sudden changes in temperature can damage the pan over time. |
Common Cast Iron Myths Busted
There’s no shortage of myths surrounding cast iron pans. Let’s bust a few of the most common ones.
Myth 1: You should never wash your cast iron pan with soap. Truth: A little bit of mild dish soap won’t harm your pan’s seasoning. Just rinse thoroughly and dry well afterward.
Myth 2: A rusted cast iron pan is ruined forever. Truth: Rust is treatable. A good scrubbing, rinse, thorough drying, and re-seasoning can bring your pan back to life.
Myth 3: Cast iron heats evenly. Truth: Cast iron retains heat well, but it doesn’t necessarily heat evenly. Pre-heating the pan can help achieve a more uniform heat.
Wrapping up
The journey of cleaning a cast iron frying pan might seem daunting at first but remember: it’s not just about cleaning—it’s about preserving a piece of culinary history. It’s about passing down something special to the next generation, just like a well-loved recipe.
And remember, cast iron pans aren’t just for traditional stoves. They can be used on modern induction stoves too. With the right care, your cast iron pan can continue to be a centerpiece in your kitchen, just as it has been in countless kitchens before yours.
So the next time you whip up your family’s favorite recipe, you’ll know exactly how to keep your trusty cast iron pan in top-notch shape for years, if not generations, to come.
Frequently Asked Questions
How do you clean a greasy cast iron frying pan?
To clean a greasy cast iron pan, start by wiping excess grease with a paper towel. Rinse with hot water, using a non-abrasive sponge to scrub away the grease. A paste of coarse salt and water can also help. Rinse and dry thoroughly.
Why should I season a cast iron pan?
Seasoning your cast iron pan creates a natural, non-stick cooking surface and helps prevent rusting. It enhances your pan’s longevity and improves your cooking experience.
Can I use soap on a seasoned cast iron pan?
While it’s generally best to avoid soap, a small amount of mild dish soap won’t harm the seasoning. Just make sure to rinse thoroughly and dry well afterward.
What type of oil should I use to season my pan?
High smoke point oils like flaxseed oil and canola oil are excellent choices for seasoning. They are able to withstand high temperatures without breaking down.
Should you wash a cast iron frying pan?
Yes, you should wash a cast iron pan, but avoid using harsh dish soaps or scrubbers. The best method is to use hot water and a sponge. If needed, a small amount of mild soap won’t harm your pan’s seasoning.
How do you clean a cast iron pan without ruining it?
Avoid abrasive cleaners and brushes. Instead, use hot water and a gentle sponge. For stubborn grime, create a paste with kosher salt and water, scrub gently, then rinse and dry. Always dry your pan thoroughly to avoid rust.
How do you clean a cast iron pan after use?
After cooking, let your pan cool slightly, then wipe it with a paper towel to remove leftover food and oil. Rinse the pan under hot water, scrubbing gently with a non-abrasive sponge. Dry thoroughly using a towel or heat it on the stove.
What should I do if my pan starts to rust?
Don’t panic! You’ll need to scrub the rust off with steel wool, rinse, and dry the pan thoroughly. Then, re-season your pan following the seasoning steps we discussed earlier.
How often should I season my cast iron pan?
If you’re using your pan regularly, it’s recommended to season it every few months. However, if your pan starts to lose its non-stick properties or shows signs of rust, it’s time to re-season.
What if my food still sticks to the pan?
Ensure your pan is properly heated before adding food. A well-seasoned pan should be naturally non-stick, but if food sticks, it might be time for a deep clean and re-seasoning.
Additional Reading
Congratulations on mastering the art and science of caring for your cast iron frying pan! But the journey to becoming a true kitchen whiz doesn’t stop here. If you’re hungry for more kitchen wisdom, check out these other guides on our site:
- For the barbecue enthusiasts, read about how to start a BBQ grill and find out what you can grill next on your freshly cleaned cast iron pan.
- Looking to maintain more than just your pans? Learn what to clean a grill with to keep your barbecue sessions running smoothly.
- Accidents happen, and spills in the oven are inevitable. Check out this guide on how to deal with an oven spill and save your oven (and dinner) from disaster.
- And if you’ve ever wondered whether you can put that coffee mug or takeaway container in the microwave, head over to our microwave-friendly materials guide and learn how to reheat with confidence.