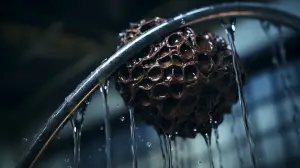
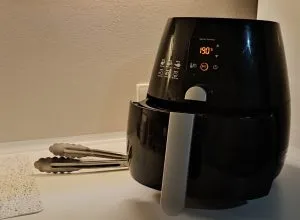
We all know how regular cleaning is critical to keeping your air fryer in top-notch condition and preventing bacteria from building up. But every once in a while, it’s important to dive deeper (pun intended) and give your machine a thorough clean. Why, you ask? That’s because of our nemesis: grease buildup. This oily offender can affect the taste of your food, cause smoke, and even become a fire hazard. To avoid these issues, deep cleaning is your air fryer’s best friend.
But don’t fret! This process doesn’t need to be daunting or overly complex. Follow this guide, and your air fryer will continue to serve you faithfully, efficiently, and deliciously.
Speaking of air fryers, if you’re still on the fence about whether to join the air fryer bandwagon, don’t fret. We’ve put together a comprehensive guide titled Air Fryers: The Modern Kitchen Miracle, shedding light on all you need to know about this versatile appliance.
Ingredients for a Deep Clean
Like preparing a recipe, deep cleaning your air fryer requires certain ‘ingredients’. Here’s what you’ll need:
- Warm soapy water: A universal cleaner, perfect for breaking down grime and grease.
- Non-abrasive scrubbing sponge: Tough on dirt but gentle on your air fryer.
- Soft-bristled brush: For those hard-to-reach corners and crevices.
- Microfiber cloth: To dry everything off, leaving no water spots behind.
The Recipe for Deep Cleaning Your Air Fryer
Just like your favorite dishes, a clean air fryer is a result of carefully following the recipe. Here’s your step-by-step guide:
Cleaning the Removable Parts
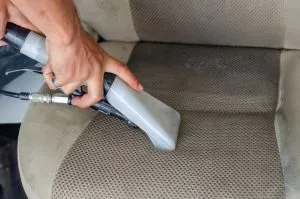
First, you need to deal with the parts of the air fryer that actually come in contact with your food – the basket and tray. Think of these as your cooking utensils; they would need a thorough cleaning.
- Remove the basket and tray from the air fryer.
- Soak them in your ‘magic potion’, the warm soapy water, for about 10-15 minutes. This should be enough to loosen up the grease and food particles.
- After soaking, arm yourself with your non-abrasive scrubbing sponge and scrub off any leftover debris. Remember, the sponge is your knight in shining armor, ready to slay the dirt dragons!
- Rinse them thoroughly under running water to remove all the soap and grime.
- Dry them with your trusty microfiber cloth. Like the sun after a rainy day, the cloth will ensure there’s not a single drop of water left behind.
Cleaning the Main Unit
With the basket and tray all sparkly clean, it’s time to give some attention to the main unit. Imagine the main unit as the castle that houses your food (basket and tray). It’s been standing tall and strong, weathering all those cooking storms, and now it deserves a bit of TLC.
- The main unit should never take a bath (be immersed in water), but that doesn’t mean it can’t be cleaned. Use a damp cloth to wipe down the entire unit, including the control panel. This will rid it of any food splatters or grease residue. Remember, no water drenching, just a light wipe.
- If you notice any stubborn food particles that are giving you a hard time, call in the reinforcements – your soft-bristled brush. Gently scrub them away, and your main unit will look as good as new.
Deep Cleaning vs. Regular Cleaning: What’s the Difference?

If you’re thinking “I clean my air fryer regularly, so why bother deep cleaning?” then let’s understand the difference. Regular cleaning is like a shower—a quick wash and rinse after every use to keep your air fryer looking clean and prevent buildup. Deep cleaning, on the other hand, is like a spa day for your air fryer—it’s a more intense process that addresses those hidden, stubborn greasy corners that regular cleaning might miss.
While regular cleaning is done after every use, deep cleaning can be done less frequently, like once a month or depending on how often you use your air fryer. Both cleaning methods are crucial for keeping your air fryer in prime condition, enhancing its lifespan, and providing you with tasty meals every time.
Maybe you’re a proud owner of an induction stove and battling to keep it spotless? We’ve got you covered! Check out our definitive guide on Cleaning Your Induction Stove: The Right Way that arms you with a treasure trove of tips to keep your stove looking like new.
Tips for Regular Cleaning
Congratulations, you’ve deep-cleaned your air fryer! But maintaining your trusty kitchen partner goes beyond occasional deep cleaning. Regular cleaning is key.
- Make it a rule of thumb to clean your air fryer after every use. This doesn’t mean you have to deep clean it every time, but don’t let the crumbs and bits of food sit overnight. The basket and drawer will thank you for it.
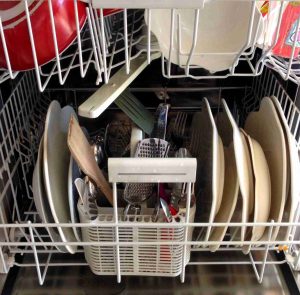
- Most air fryers are dishwasher safe, but check the owner’s manual for specific cleaning instructions. If it’s dishwasher safe, your life just got a whole lot easier.
- Lastly, always remember to clean and dry all parts thoroughly before putting your air fryer back together and storing it.
Follow these tips, and you’ll find that your air fryer is always ready for your next culinary adventure.
Common Mistakes When Cleaning Air Fryers and How to Avoid Them
Cleaning an air fryer may seem straightforward, but there are common mistakes that could potentially damage your beloved appliance. Here’s what to avoid:
- Immersing the Main Unit in Water: The main unit houses electrical components, and immersing it in water could cause a malfunction or even a safety hazard. Always remember to clean this part with a damp cloth only.
- Using Abrasive Cleaners or Tools: Using harsh cleaners or abrasive scrubbers might seem like a good idea for stubborn grime, but they can scratch and damage the surface. Opt for gentle, non-abrasive materials.
- Not Drying Properly: Leaving parts damp after cleaning can lead to the development of mildew or rust. Always ensure all parts are thoroughly dry before reassembling and storing.
- Ignoring the Heating Element: Over time, the heating element can accumulate grease and burnt food particles. While cleaning, make sure to gently wipe the heating element with a soft brush.
Accidents happen and oven spills are no exception. But don’t panic! Our handy tutorial on Cleaning Oven Spills: The Quick & Easy Guide can help you tackle this sticky predicament with ease.
The Health Benefits of Deep Cleaning Your Air Fryer
As passionate as we are about our food, we should also be about our health. Deep cleaning your air fryer doesn’t just prolong its life—it also enhances your health. Regular cleaning get rid of visible dirt, but deep cleaning goes beyond the surface. It targets the hidden greasy buildup that could harbor harmful bacteria or mold, which, when they come into contact with food, could cause food poisoning. Deep cleaning also ensures your food tastes as it should, without any unpleasant residue tastes.
So, if you’ve been wondering why your homemade fries don’t taste as good as they used to, maybe your air fryer is telling you it’s time for a deep clean. In essence, a clean air fryer equals healthier, tastier food.
Wrapping up
Taking care of your appliances, especially your air fryer, goes a long way in ensuring they serve you well for a long time. And it isn’t just about enhancing their lifespan—it’s about your health too. By learning the ins and outs of deep cleaning your air fryer, you are one step closer to making your kitchen a healthier and happier place.
Remember, deep cleaning isn’t a substitute for regular cleaning—it’s an essential complement. Both cleaning techniques work hand in hand to keep your air fryer in tip-top shape and your meals tasting just right.
Avoid common cleaning mistakes, follow the deep cleaning checklist, and soon, you’ll be a pro at maintaining your air fryer. As you continue to delight in the culinary world, we hope our guide proves helpful every step of the way.
Don’t forget, if you’re looking for more guidance on maintaining your kitchen appliances, we’ve got a wealth of resources on our website. From keeping your induction stove gleaming to caring for your cast-iron frying pan, dealing with oven spills, and even cleaning your grill, we’ve got you covered.
Now, go ahead and give your air fryer the cleaning it deserves. After all, it’s more than just a kitchen appliance—it’s a trusted partner in your cooking adventures. Happy deep cleaning!
FAQ
How do you clean a filthy air fryer?
Cleaning a filthy air fryer involves deep cleaning. Start by removing the basket and tray and soak them in warm soapy water for 15 minutes. Scrub gently with a non-abrasive sponge, rinse, and dry. Wipe down the main unit and the control panel with a damp cloth. For stubborn particles, use a soft-bristled brush to gently scrub them away. Let it dry completely before reassembly.
Is it safe to clean the inside of an air fryer?
Yes, it is safe and necessary to clean the inside of an air fryer. However, you must never immerse the main unit in water as it contains electrical components. Instead, use a damp cloth or a soft-bristled brush to gently clean the interior. Ensure all components are dry before reassembling.
How do you deep clean an air fryer plate?
Start by removing the plate from the air fryer and soak it in warm soapy water for around 10-15 minutes. This helps to loosen any food residue or grease. After soaking, scrub it gently with a non-abrasive sponge, rinse thoroughly, and dry with a microfiber cloth. Make sure the plate is completely dry before placing it back in the air fryer.
How often should I deep clean my air fryer?
The frequency of deep cleaning depends on how often you use your air fryer. If you use it regularly, deep cleaning once a month is recommended. However, if you use it less frequently, deep cleaning every 2-3 months should suffice.
Can I use any cleaning products to deep clean my air fryer?
Always use non-abrasive cleaning products and tools to avoid damaging your air fryer. Harsh cleaners or scrubbers could scratch and damage the surface of your appliance. For most cleaning, warm soapy water will do the trick.
My air fryer has a burnt smell even after cleaning. What should I do?
The burnt smell could be due to residue trapped in the heating element. Be sure to gently clean the heating element with a soft-bristled brush during your deep cleaning process. If the smell persists, it might be time to consult the manufacturer or a professional.
What if my air fryer parts are dishwasher-safe?
If your air fryer parts are dishwasher-safe, as per the owner’s manual, you can clean them in the dishwasher. However, you might still need to manually deep clean stubborn grease or food particles.
Can I use the air fryer immediately after deep cleaning?
After deep cleaning, ensure all parts of the air fryer are completely dry before reassembly and use. Using it while parts are still damp could damage the appliance or lead to electrical faults.
ADDITIONAL READING
- Do you want to replace your old Air Fryer or just get your first one? Check out our list of the 7 best Air Fryers on the market.
- Consider checking out our list of the best toaster ovens that also offer air frying capabilities, making it a versatile kitchen appliance for toasting, baking, and more.
- And if you’re wondering about the best ways to get your grill sparkling clean, we’ve got your back. Navigate your way through our in-depth guide, Grill Cleaning 101: Everything You Need to Know, to ensure your grill is always ready for the next BBQ.