Contents
ToggleKey Takeaway:
- The problem with drywall dust: Drywall dust can be hazardous to your health if inhaled, and it can easily spread throughout your home or workspace if not properly cleaned up.
- How to clean drywall dust on the ground: Properly handle plastic sheeting to contain the dust, sweep and dispose of the dust properly, and use a vacuum cleaner specifically designed to handle drywall dust.
- How to clean drywall dust on drywall: Use dry-cleaning methods such as a dry cloth or brush to remove dust, use a tack cloth for small areas, and use a wet drywall sponge to gently wipe down the surface.
- How to clean wet or semi-wet joint compound: Perform fast cleanup by removing excess compound, use warm water to dissolve the compound, and lightly rub off any remaining residue with a damp cloth.
- How to clean dried drywall joint compound: Scrape off any excess compound, use a vacuum to remove loose particles, and use a damp cloth to wipe away any remaining residue.
- Tips for avoiding drywall joint compound mess: Use a drywall mud pan to contain the compound, scoop less mud to minimize spills, and cover surfaces with plastic sheeting or drop cloths to prevent messes.
Introduction
Drywall dust can be a frustrating and challenging substance to clean. Understanding the proper techniques and tools is essential for an effective cleanup. By following the instructions below, you will be equipped to efficiently remove drywall dust from your home or workspace. Don’t miss out on the opportunity to learn these valuable tips and ensure a clean environment.
The Problem with Drywall Dust

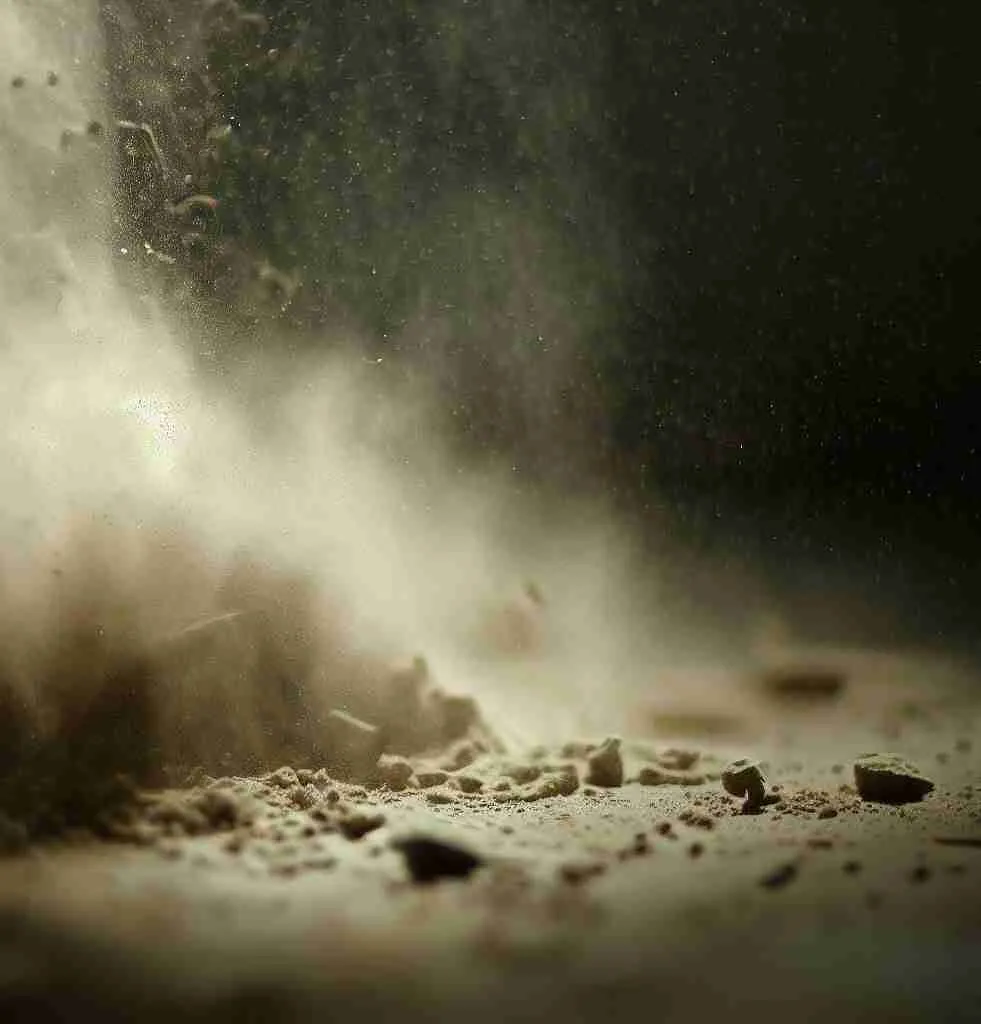
Drywall dust poses a significant challenge due to its potential health hazards and the difficulty of removing it completely. Its fine particles can easily become airborne and are known to cause respiratory issues when inhaled. In addition, this dust has a tendency to settle on surfaces, making it challenging to eliminate. Proper cleaning techniques become crucial to ensure a dust-free environment.
Fortunately, there are effective methods to address the problem of drywall dust and restore a clean and safe space.
To tackle the issue of drywall dust, it is essential to start with containment measures. By sealing off the area where drywall work is being done, such as using plastic sheets or barriers, the spread of dust can be minimized. This helps prevent contamination of other rooms and makes the cleanup process more manageable. It is also important to ensure proper ventilation to reduce the concentration of airborne dust particles.
When it comes to cleaning drywall dust, using a combination of strategies is recommended. Begin by using a soft-bristle broom or brush to sweep off any visible dust from surfaces. Follow this by using a vacuum cleaner with a HEPA filter to effectively capture the finer particles. The HEPA filter is crucial as it prevents the dust from being recirculated back into the air. A damp mop or cloth can then be used to wipe down surfaces, further removing any remaining dust.
While cleaning, it is crucial to pay attention to hidden or hard-to-reach areas where dust may accumulate, such as on carpets or rugs, behind furniture, inside air vents or carpeted stairs. Special attention should also be given to electronic devices and appliances, as drywall dust can be damaging to their functioning. Cleaning mishaps, such as spilled laundry detergent, should also be addressed promptly to prevent appliance damage. To ensure thorough cleaning, multiple passes may be necessary.
To enhance the cleaning process, incorporating the use of water or a mild cleaning solution, such as dish soap, can also be beneficial. Dampening the surfaces before wiping them down can help capture dust particles more effectively. However, it is essential to avoid using excessive moisture, as this can lead to damage to the walls or surfaces.
In summary, the problem with drywall dust lies in its potential health risks and persistent nature. By implementing containment measures, utilizing appropriate cleaning tools, and being thorough in the process, it is possible to effectively address this issue. Regular cleaning and maintenance, including frequent carpet shampooing, are crucial to ensure a dust-free and healthy environment.
How to Clean Drywall Dust on the Ground

When it comes to cleaning drywall dust on the ground, there are a few key steps to follow for a thorough and efficient process. Firstly, it’s important to handle plastic sheeting properly to prevent any further spreading of dust. Next, sweeping and disposal techniques need to be employed to effectively remove the drywall dust without creating an unnecessary mess. Lastly, the use of a vacuum cleaner specifically designed for drywall dust can greatly aid in the cleaning process.
Proper Handling of Plastic Sheeting
Proper handling of plastic sheeting is crucial in effectively containing and disposing of drywall dust. Follow this 6-step guide to ensure a clean and efficient process:
- Folding Technique: Start by carefully folding the plastic sheeting, making sure to contain any drywall dust within. Fold the sheeting in on itself multiple times until it forms a small and manageable package.
- Secure Packaging: Once folded, secure the package with tape or ties to prevent any accidental openings or spills during disposal. This will help maintain a clean environment and minimize the risk of dust spreading.
- Outdoor Disposal: Take the packaged plastic sheeting outside for proper disposal. Place it in an outdoor bin designated for construction waste to ensure safe and responsible disposal of drywall dust.
- Prevent Spreading: Throughout the handling process, be cautious not to shake or jostle the plastic sheeting excessively as this can cause dust particles to become airborne, leading to potential contamination of other areas.
- Personal Protective Equipment (PPE): While handling plastic sheeting, it is recommended to wear appropriate PPE such as gloves and a mask to protect yourself from potential exposure to drywall dust particles.
- Cleaning Tools: After disposing of the plastic sheeting, clean any tools or equipment used during the process thoroughly before storing them away.
An important point worth mentioning is that improper handling of plastic sheeting can lead to heightened allergen risks due to the release of fine dust particles into the air. Therefore, following a professional approach ensures not only proper containment but also minimizes potential health hazards associated with drywall dust exposure.
Cleaning drywall dust is a messy business, but with the right technique, you can sweep away the chaos and leave behind a dust-free paradise.
Sweeping and Disposal
Sweeping and Disposal involves carefully removing drywall dust from the ground and properly disposing of it to prevent further spread. Key techniques include handling plastic sheeting, sweeping with a soft-bristled broom, and vacuuming with a shop vacuum. Vacuum hose extensions can be used for added convenience.
Vacuuming Drywall Dust
This technique ensures optimal cleanliness and minimizes the spread of fine particles. The following steps outline the process in detail.’
- Prepare the Vacuum: Before vacuuming, ensure that the shop vacuum is equipped with a filter to capture fine dust particles effectively.
- Select Proper Attachments: Choose appropriate attachments such as a wide nozzle or brush nozzle to effectively collect drywall dust from various surfaces.
- Vacuum in Controlled Strokes: Begin vacuuming from top to bottom, using slow and controlled strokes to thoroughly collect drywall dust without dispersing it throughout the space.
- Paying Attention to Corners and Edges: Ensure that all corners, edges, and crevices are properly vacuumed by maneuvering the attachments accordingly.
- Frequently Empty the Vacuum: Regularly empty the collected dust in a sealed bag or proper container outdoors to prevent recontamination of cleaned areas.
- Proper Maintenance: Clean and maintain the vacuum regularly to maximize its suction power and efficiency for future use.
To enhance the effectiveness of vacuuming drywall dust, it is crucial to use high-quality filters that can efficiently capture fine particles. Frequently inspecting and replacing filters ensures optimal performance. Additionally, wearing a dust mask while performing this task can protect against inhaling harmful particles.
Clearing drywall dust from your walls? Time to get dusty and unleash your inner clean freak!
How to Clean Drywall Dust on Drywall

When it comes to cleaning drywall dust on drywall surfaces, there are a few effective methods that can make the task easier and more efficient.
One option is to employ dry-cleaning methods, which involve using tools and techniques specifically designed to remove dust without the need for liquid solutions.
Another approach is to utilize a tack cloth for smaller areas, as it can effectively pick up and trap dust particles.
Additionally, using a wet drywall sponge can be beneficial for larger areas, as it helps to remove dust while also providing a light cleaning.
These various methods cater to different areas and sizes, ensuring thorough cleaning of drywall surfaces.
Dry-Cleaning Methods
Dry-cleaning methods are essential for effectively removing drywall dust without the use of liquid-based solutions. These techniques help ensure a thorough cleaning process, preparing the surface for further cleaning or finishing. Here are some recommended dry-cleaning methods to consider:
| 1. Lightly brushing the walls | – Using a soft-bristled brush, lightly brush off loose drywall dust from the walls in a gentle sweeping motion. |
| 2. Shop vacuum with wide nozzle | – Utilize a shop vacuum with a wide nozzle attachment to effectively collect drywall dust particles from the wall surface. |
| 3. Shop vacuum with brush nozzle | – Attach a brush nozzle to the shop vacuum to access hard-to-reach areas and corners while collecting drywall dust. |
| 4. Tack cloth for debris removal | – Gently wipe drywall surfaces with a tack cloth to remove leftover dust and debris. Avoid applying excessive pressure that could embed wax into the drywall paper. |
In addition to these techniques, it’s important to note that regular maintenance of equipment such as brushes and vacuums is crucial for optimum performance and longevity.
It should be considered that using these dry-cleaning methods can significantly reduce the amount of wet cleaning required, minimizing potential damage to the walls and promoting a cleaner work area.
An interesting fact relates to the effectiveness of tack cloths that have been widely used in various industries for achieving clean surfaces before painting or refinishing tasks.
Keep your drywall looking fly with a tack cloth, but don’t press too hard or you’ll have a wax-ident!
Tack Cloth for Small Areas
Using a tack cloth for small areas is an effective method for gently wiping off debris on drywall without causing damage. Here is a simple three-step guide to using a tack cloth for cleaning smaller spaces:
- Select a High-Quality Tack Cloth: Choose a tack cloth that is specifically designed for cleaning drywall surfaces. Ensure that the cloth is clean and free from any contaminants before use.
- Lightly Wipe the Surface: Gently run the tack cloth over the drywall surface, applying minimal pressure. This will pick up any dust or debris present on the walls without leaving behind residue.
- Dispose of Properly: After cleaning, dispose of the used tack cloth properly to avoid spreading any remaining dust or particles in other areas. Seal it in a plastic bag and discard it in an appropriate waste bin.
In addition, it’s important to note that while using a tack cloth can effectively remove debris from drywall surfaces, caution should be taken not to press too hard. Pressing too firmly may embed wax from the cloth into the drywall paper, potentially causing damage.
It’s worth mentioning that removing drywall dust and debris from smaller areas can be time-consuming but necessary to maintain a clean environment after construction or renovation projects.
Get your sponge and get ready to make that drywall shine – the wetter, the better!
Using a Wet Drywall Sponge
A wet drywall sponge is an essential tool for cleaning drywall dust. It ensures thorough and efficient removal of dust particles, leaving the surface clean and ready for further finishing.
Here is a simple 3-step guide on using a wet drywall sponge:
- Wetting the Sponge:
- Moisten the drywall sponge by dipping it into a bucket or sink filled with water.
- Squeeze out excess water so that the sponge is damp but not dripping.
- Ensure that the sponge is sufficiently saturated to effectively loosen and remove dried dust.
- Gently Wiping:
- With a firm yet gentle grip, start wiping the drywall surface in long downward strokes.
- Be cautious not to press too hard or apply excessive pressure, as this may damage the drywall texture.
- Regularly rinse the sponge in clean water to prevent redepositing dust onto the surface.
- Thorough Rinse and Drying:
- Once you have wiped down the entire area, rinse the sponge thoroughly under running water to remove any remaining dust residues.
- Squeeze out excess water from the sponge before continuing with further cleanup or drying processes.
- Allow both the surface and sponge to air-dry completely before proceeding with additional tasks.
By following these steps, you can efficiently utilize a wet drywall sponge to achieve a well-cleaned and debris-free surface without damaging your drywall’s integrity.
Unique details covered in this explanation include tips on gripping the sponge firmly yet gently, as well as an emphasis on avoiding excessive pressure during wiping to protect the drywall texture from potential damage.
Drenched in the joint compound? Don’t fret, I’ll show you how to clean it up like a pro.
How to Clean Wet or Semi-Wet Joint Compound

When it comes to cleaning wet or semi-wet joint compound from drywall, there are a few effective methods you can employ for fast and efficient cleanup. One approach is to use warm water, which helps to soften the compound, making it easier to remove. Another technique involves lightly rubbing off the compound with a damp cloth, which can effectively lift away the residue. By implementing these strategies, you can ensure a thorough and convenient cleaning process that leaves your drywall looking pristine.
Fast Cleanup
Fast and Efficient Cleaning of Drywall Joint Compound
- Quickly Remove Wet Joint Compound:
- Be prompt in cleaning wet joint compound to prevent it from hardening.
- Have paper towels or cloth rags ready for immediate cleanup.
- Gently wipe off excess compound with the towel, avoiding excessive pressure.
- Utilize Warm Water for Goopy Compound:
- Warm water is highly effective in cleaning semi-wet joint compounds.
- Soak tools in hot water to facilitate easier cleaning.
- Use a damp cloth to rub off the dried compound, applying minimal pressure lightly.
- Addressing Fully Dried Joint Compound:
- Cleaning fully dried joint compound can be challenging.
- Consider sanding or scraping as the most effective methods.
- Exercise caution and precision while removing the dried compound.
Pro Tip: For faster and more convenient drywall cleanups, invest in high-quality tools such as a drywall mud pan, use an appropriate amount of joint compound to avoid excessive sanding, and cover surfaces to minimize unnecessary mess. Don’t be afraid to turn up the heat when cleaning goopy joint compound with warm water.
Using Warm Water
In order to effectively clean drywall dust and joint compound, using warm water can be a highly beneficial technique. Warm water helps to soften and break down the particles, making them easier to remove from surfaces. Here is a simple 3-step guide on how to effectively use warm water for cleaning:
- Wetting the Cloth or Sponge: Start by dampening a cloth or sponge with warm water. Ensure that it is not soaking wet but has enough moisture to adequately tackle the drywall dust or joint compound.
- Gentle Rubbing Motion: Once the cloth or sponge is damp, gently rub the targeted area with downward strokes. This motion helps to loosen and lift off any dried-on residue without damaging the drywall surface.
- Regular Rinsing: As you proceed with cleaning, make sure to regularly rinse out the cloth or sponge to prevent transferring debris back onto the surface. This ensures that each wipe is as effective as possible in removing all traces of drywall dust or joint compound.
An important detail to note about using warm water is that it works best for goopy or semi-wet joint compound. When dealing with fully dried joint compound, other methods such as sanding or scraping may be necessary for effective cleaning.
Pro Tip: To enhance the cleaning power of warm water, consider soaking tools used in hot water before starting your cleaning process. The warmth will further aid in softening any hardened residues, making them easier to remove without excessive force or pressure on the surfaces being cleaned.
Get rid of dried joint compound like a gentle breeze with these simple steps.
Lightly Rubbing Off with a Damp Cloth
To effectively remove drywall dust and residue from surfaces, lightly rubbing off with a damp cloth is a recommended technique. With this method, you can efficiently clean the drywall surface without causing any damage or leaving behind streaks.
Here is a simple 3-step guide to lightly rubbing off with a damp cloth:
- Dampen the Cloth: Start by moistening a clean, lint-free cloth with water. Ensure that the cloth is not dripping wet but slightly damp to avoid excessive moisture on the drywall surface.
- Gently Wipe in Downward Strokes: With your damp cloth, gently wipe the drywall surface using downward strokes. Apply light pressure while maintaining an even motion to lift away the dust and debris. Avoid scrubbing too hard as this may cause damage to the drywall.
- Regularly Rinse and Squeeze Out Excess Water: As you continue to clean, periodically rinse the cloth in clean water and squeeze out any excess moisture. This will prevent the buildup of dirt and ensure that you are always working with a relatively clean surface.
Remember, lightly rubbing off with a damp cloth works well for removing light dust and residue from dried joint compound or drywall surfaces. However, for more stubborn or hardened residues, alternative methods such as sanding or scraping may be necessary.
For best results:
- Use a microfiber cloth or soft cotton towel as they are gentle on surfaces.
- Avoid using abrasive cleaners or harsh chemicals that could damage the drywall finish.
- Work in smaller sections at a time to ensure thorough cleaning without spreading dirt around.
- After cleaning, allow sufficient time for the surface to air-dry completely before applying any additional treatments or finishes.
By following these suggestions and practicing caution while cleaning, you can effectively remove drywall dust using the technique of lightly rubbing off with a damp cloth. Cleaning dried drywall joint compound may feel like trying to remove a permanent marker from a whiteboard – it’s challenging, but not impossible!
How to Clean Dried Drywall Joint Compound
Cleaning dried drywall joint compound is a crucial step in maintaining the cleanliness and appearance of your walls. To effectively clean dried drywall joint compound, follow these six simple steps:
- Gather the necessary tools: Start by gathering a soft-bristle brush, vacuum cleaner with a brush attachment, damp cloth, mild detergent, and warm water.
- Remove loose dust and debris: Begin by using the soft-bristle brush to gently sweep away any loose dust and debris from the surface of the dried compound. Avoid applying too much pressure to prevent damage to the drywall.
- Vacuum the area: Attach the brush attachment to your vacuum cleaner and use it to carefully vacuum the area, ensuring that all remaining dust particles are removed. Pay close attention to corners and edges where dust tends to accumulate.
- Dampen a cloth: Dampen a cloth with warm water and wring out any excess moisture. Be careful not to saturate the cloth, as excessive moisture can damage the drywall.
- Clean the surface: Use a damp cloth to gently wipe down the surface of the dried drywall joint compound. Apply mild detergent to the cloth if necessary, but be sure to test it in an inconspicuous area first to avoid any potential damage or discoloration.
- Allow to dry: After cleaning, allow the surface to air dry completely before applying any paint or other finishes.
In addition to these steps, it is important to note that when cleaning dried drywall joint compound, it is crucial to take necessary safety precautions such as wearing protective eyewear and gloves to avoid any potential skin irritation or harm.
For a spotless finish and to ensure the longevity of your walls, it is essential to clean dried drywall joint compound regularly. Incorporating these steps into your cleaning routine will help maintain the pristine appearance of your walls and contribute to a cleaner and healthier living environment.
3 Tips for Avoiding Drywall Joint Compound Mess
When it comes to avoiding the mess caused by drywall joint compound, there are three key tips that can make a world of difference:
- First off, using a drywall mud pan can significantly contain dust and residue, keeping your work area clean and organized.
- Additionally, scooping less mud at a time can help minimize spills and excess debris.
- Lastly, covering surfaces that are not being worked on can provide an extra layer of protection against dust particles settling elsewhere.
These simple yet effective techniques will help you maintain a tidy space while working with drywall.
Use a Drywall Mud Pan
A Drywall Mud Pan is an essential tool for maintaining cleanliness and efficiency during the drywall installation process. It allows for easy access to joint compounds, preventing unnecessary mess and wastage.
- Place the Drywall Mud Pan on a sturdy surface near the work area.
- Scoop an appropriate amount of joint compound into the pan using a taping knife.
- Spread the compound evenly across the knife’s blade, removing any excess by scraping it against the edges of the pan.
- Apply the compound to the desired area on the drywall, using smooth and consistent strokes.
- Periodically clean the taping knife by wiping off excess compound back into the pan.
- When finished, carefully clean and store your Drywall Mud Pan for future use.
Using a Drywall Mud Pan significantly reduces cleanup time and ensures that joint compounds are properly contained. It also prevents contamination of other surfaces, resulting in a more efficient and professional finish.
To maximize its effectiveness, ensure that you choose a sturdy and reliable Drywall Mud Pan. Additionally, regularly inspect and clean your pan to maintain its functionality.
Scoop Less Mud
To minimize the amount of drywall joint compound used, it is advisable to employ the technique of “Moderate Mud Application”. This approach ensures efficient usage of mud while reducing the need for excessive sanding. Here is a 4-step guide to effectively “Scoop Less Mud”:
- Assess the surface: Before applying the drywall joint compound, carefully evaluate the condition of the surface. Fill in any visible gaps or holes beforehand to reduce the amount of compound required.
- Use a smaller trowel: Opt for a smaller-sized trowel when scooping out mud from the bucket. This helps prevent over-application and promotes better control over mud distribution.
- Apply in thin layers: Rather than applying thick layers of joint compound all at once, apply thin and even coats. This allows for easier spreading and reduces the chances of excess material buildup.
- Feather edges: Feathering refers to blending the edges of the applied joint compound with surrounding areas to create a seamless finish. By feathering outwards towards the edges, you can achieve a smooth transition without adding unnecessary layers.
It is worth noting that this approach not only minimizes wastage but also results in a neater and more professional-looking final result when working on drywall projects. Keep your walls clean and your sanity intact by covering surfaces before applying drywall mud – it’s like a protective shield against messy mishaps.
Cover Surfaces
Covering surfaces is an essential step in preventing drywall mud from being inadvertently deposited on unwanted areas during the application process. This preemptive measure ensures a cleaner and more efficient workflow.
- Maintaining Cleanliness: Keeping surfaces covered helps in maintaining a clean environment by preventing drywall mud from splattering or spreading onto floors, furniture, or other surfaces.
- Efficiency and Convenience: By covering surfaces, such as countertops or cabinets, with protective materials like plastic sheets or drop cloths, cleanup becomes quicker and easier after the job is done.
- Prevention of Damage: Covering surfaces safeguards them against potential damage caused by accidental spills or splatters of joint compound. It also minimizes the need for additional cleaning or repairs afterward.
To ensure complete protection, it is advised to cover all exposed surfaces that are at risk of being affected by drywall mud during the application or repair process. Taking these precautions will help maintain a clean and tidy working environment throughout the project.
An interesting fact related to this topic is that using specialized surface protection products, such as adhesive mats or floor protectors specifically designed for construction sites, can provide added convenience and efficiency in covering surfaces effectively.
Conclusion
The cleaning process for drywall dust is essential to ensure a dust-free and clean environment. By following the appropriate methods and techniques, you can effectively remove drywall dust from surfaces.
Additionally, using tools such as a vacuum cleaner and microfiber cloth can aid in the removal process. Moreover, taking preventive measures like covering furniture and wearing protective gear can minimize the spread of dust.
Some Facts About How to Clean Drywall Dust:
- ✅ Drywall dust on the ground is easily disturbed and can be distributed throughout the house if not careful.
- ✅ Plastic sheeting with drywall dust can be folded and taken outside for disposal.
- ✅ Sweep drywall dust on the floor gently with a soft-bristled broom and dispose of it in an outdoor bin.
- ✅ Vacuuming drywall dust should be done with the vacuum placed outdoors and the hose run inside.
- ✅ Cleaning drywall dust on drywall requires dry-cleaning methods before using liquid-based methods.
FAQs about How To Clean Drywall Dust
How should I clean up drywall dust on the ground?
Fine drywall dust on the ground can easily be disturbed and spread throughout the house. To clean it up, follow these steps:
- If the drywall dust is on plastic sheeting, slowly fold the edges of the sheeting inward and take it outside to shake out or dispose of it.
- For drywall dust on the floor, sweep it up with a soft-bristled broom, being careful not to sweep vigorously. Use a dustpan to collect the dust and dispose of it outside in a bin.
- If you prefer to vacuum the drywall dust, place the vacuum outside if possible and run the hose inside, using vacuum hose extensions if needed.
What are the best methods to clean drywall dust off drywall?
Drywall accumulates a layer of dust during remodeling projects, but cleaning it can be a challenge. Here’s how to clean drywall dust off drywall:
- Use a soft broom or hand brush to lightly brush the dust off the walls, moving from top to bottom. Sweep the dust off the floor before proceeding.
- With a dust mask on, clean the drywall using the wide nozzle and/or brush nozzle on a shop vacuum. Start from the top and work downward, applying light pressure to avoid embedding the dust into the paper surface.
- For small areas, use a tack cloth to very lightly wipe off debris. Avoid pressing too hard, as pressing too hard can embed wax in the drywall paper.
- Wet a drywall sponge and squeeze out excess water. With gentle pressure, pull the sponge in downward strokes from the top of the drywall. Rinse the sponge frequently and change the water as needed.
Can wet cleaning methods be used to clean drywall joint compound?
As long as the joint compound is wet or semi-wet, it can be cleaned off with water. Here are some tips for cleaning wet or semi-wet joint compound:
- Act quickly and have a paper towel or cloth rag to clean up the wet compound immediately.
- Use warm water to clean goopy or semi-wet compound. Water will have a reduced effect once the compound hardens.
- You can soak tools in hot water for about 10 minutes to easily remove water-soluble joint compound.
- Lightly rub off the compound with a warm, damp cloth.
How can I clean dried drywall joint compound?
Cleaning dried drywall joint compound is tough as it is designed to be long-lasting. Here’s what you can do:
- If the dried compound is on a drywall tool, use another drywall tool or a putty knife as a scraper to remove it.
- If the dried compound is on a delicate surface like a floor, gently tap the dried mud from the top with a cloth-wrapped hammer or a rubber mallet to break it up. Then scrape it from the side with a plastic implement.
What are some tips to minimize drywall dust during a remodel project?
To minimize drywall dust during a remodel project, consider these tips:
- Use a drywall mud pan instead of scooping mud directly from the bucket to limit mess.
- Avoid over-applying drywall joint compound to reduce the amount of mud that needs to be sanded later on.
- Cover surfaces with dropcloths or protective sheets to catch drips and deposits.
What safety precautions should I take when cleaning drywall dust?
When cleaning drywall dust, it’s important to take safety precautions to protect your health:
- Wear a dust mask or respirator to prevent inhaling fine particles.
- Use protective gloves to avoid direct contact with the dust.
- Consider using safety goggles to protect your eyes from any airborne dust or debris.
Additional Reading
Cleaning drywall dust is just one part of maintaining a clean and healthy home environment. You might be facing other cleaning challenges too. Here are some articles that could help you with those:
- How to Disinfect Carpet Without a Steam Cleaner: Sometimes, a steam cleaner isn’t available. This guide will show you how to get your carpet disinfected without one.
- How to Handle an Oven Spill: Accidental spills happen, even in an oven. Learn the best way to deal with this sticky situation in this article.
- All About Steam Cleaners: A comprehensive guide to understanding the uses and benefits of steam cleaners.
- Spot Cleaner Machines: A Deep Dive: Get insights about spot cleaner machines and how they can be your best friend when dealing with stubborn spots and stains.
- Choosing the Right Upright Vacuum Cleaner: An upright vacuum cleaner is a valuable tool for any home. This article guides you in choosing the right one for your needs.

